1. Links Manager
1.1 Links Manager Overview
SEO Repair Kit’s Links Manager brings your website’s link monitoring and management tools together in one place. It helps you scan content for broken links, monitor 404 errors, automate link scans, review scan history and alerts, manage Smart Redirects, and access Internal Linking tools.
In this guide
- How to access Links Manager
- Understanding the Links Manager Dashboard
- Links Scan
- 404 Monitor
- Auto Scan
- Notifications
- Smart Redirects
- Internal Linking
- Where to start
How to Access Links Manager
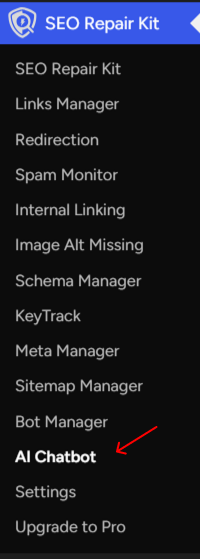
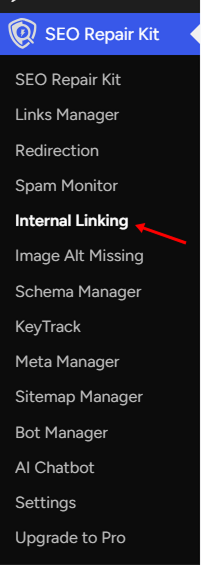
From your WordPress dashboard, go to:
SEO Repair Kit → Links Manager
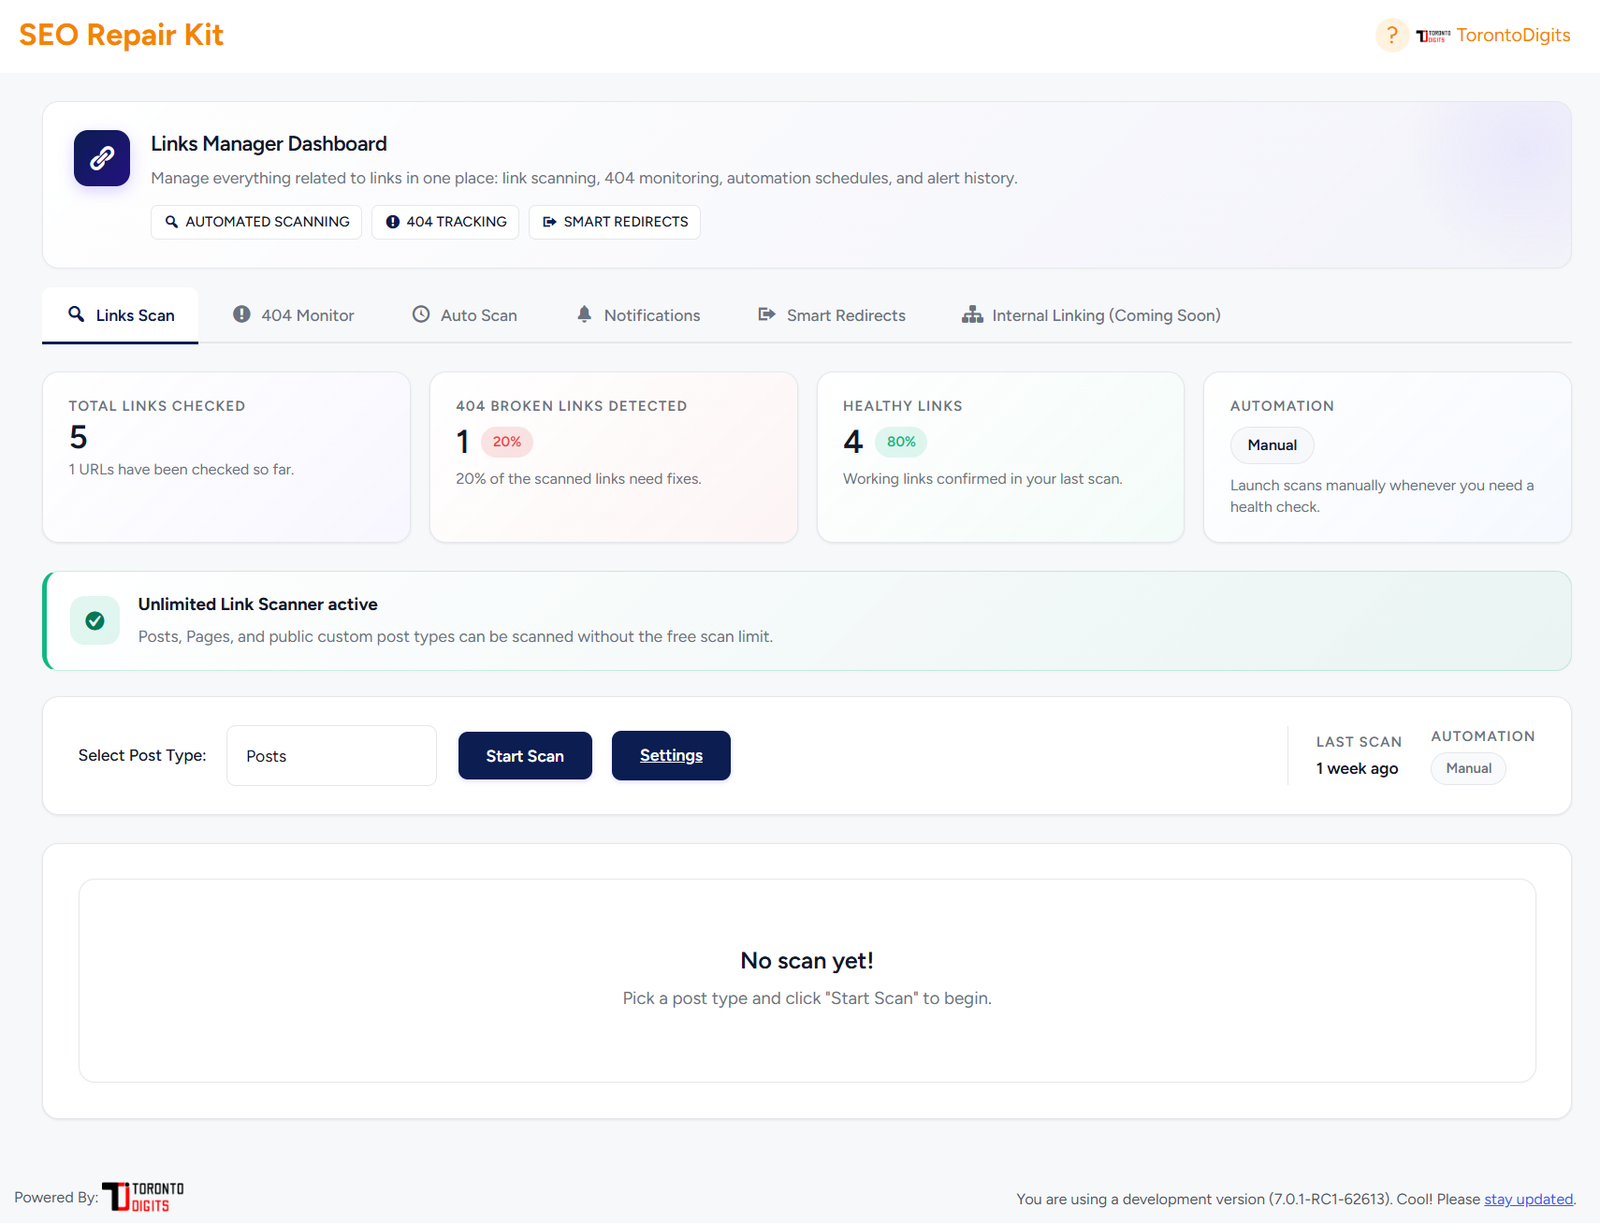
The Links Manager Dashboard opens with several tabs that let you manage different link-related tasks from one place.
Understanding the Links Manager Dashboard
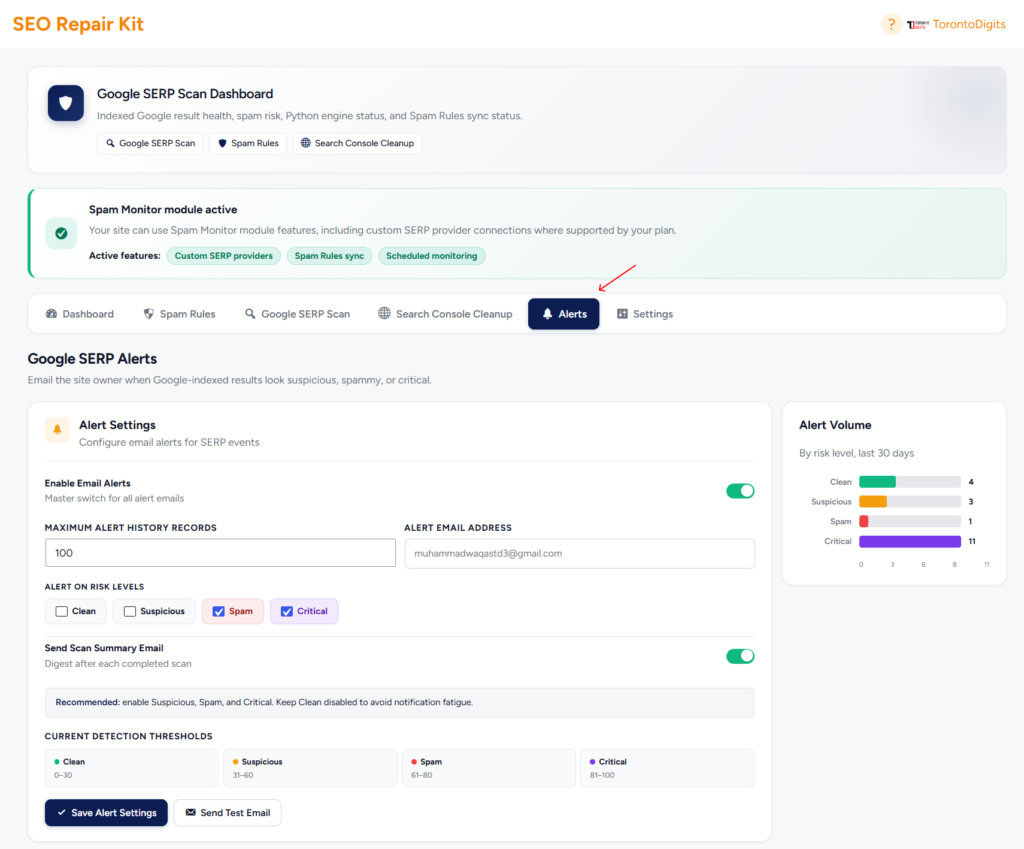
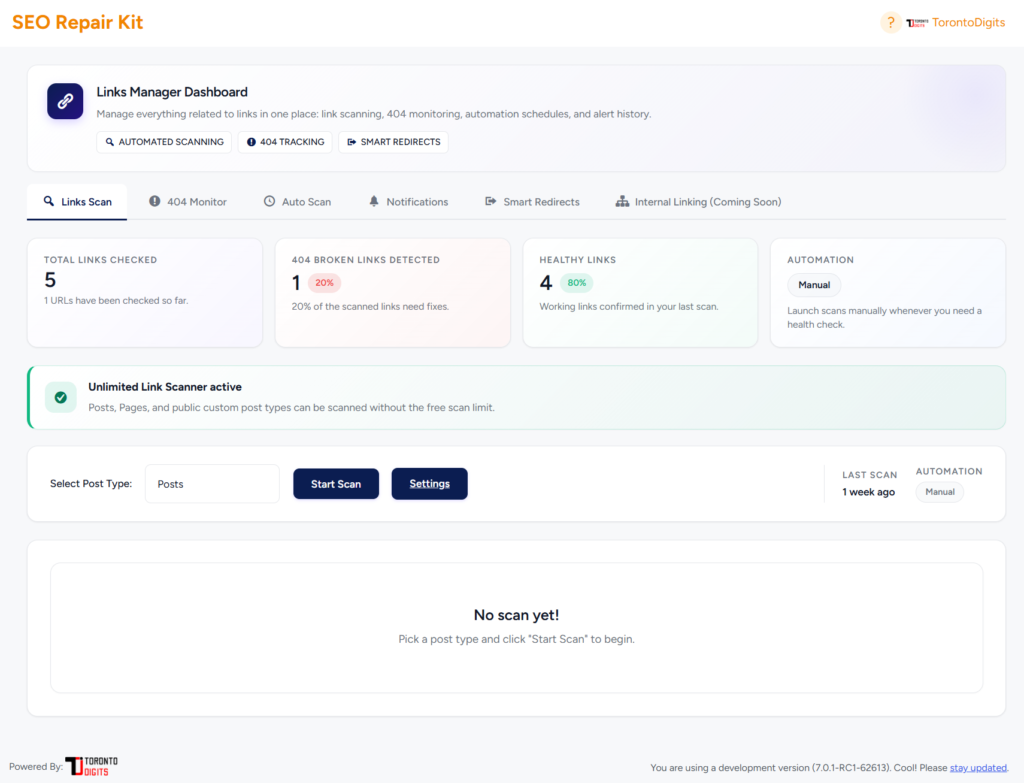
At the top of the Links Manager, you can access six main areas:
- Links Scan
- 404 Monitor
- Auto Scan
- Notifications
- Smart Redirects
- Internal Linking
Each area serves a different purpose in managing your website’s links.
Links Scan
Links Scan lets you scan selected content on your website and identify link issues.
The dashboard provides a quick summary of your latest link scan, including:
Total Links Checked
Shows the number of links checked during the scan.
Broken Links Detected
Shows how many scanned links were identified as broken and may require attention.
Healthy Links
Shows the number of links that responded successfully during the scan.
Automation
Shows whether your link scanning is currently being performed manually or through an automated schedule.
To run a scan, select the content type you want to check and click Start Scan.
Scan Your Website for Broken Links →
404 Monitor
The 404 Monitor records requests for URLs on your website that return a 404 response.
It helps you identify:
- Frequently requested missing URLs
- The number of times a missing URL has been requested
- IP addresses associated with requests
- User agents
- When an error was first and last detected
You can filter the records, export them, clear logs, and take action on URLs that should redirect somewhere else.
Monitor and Manage 404 Errors →
Auto Scan
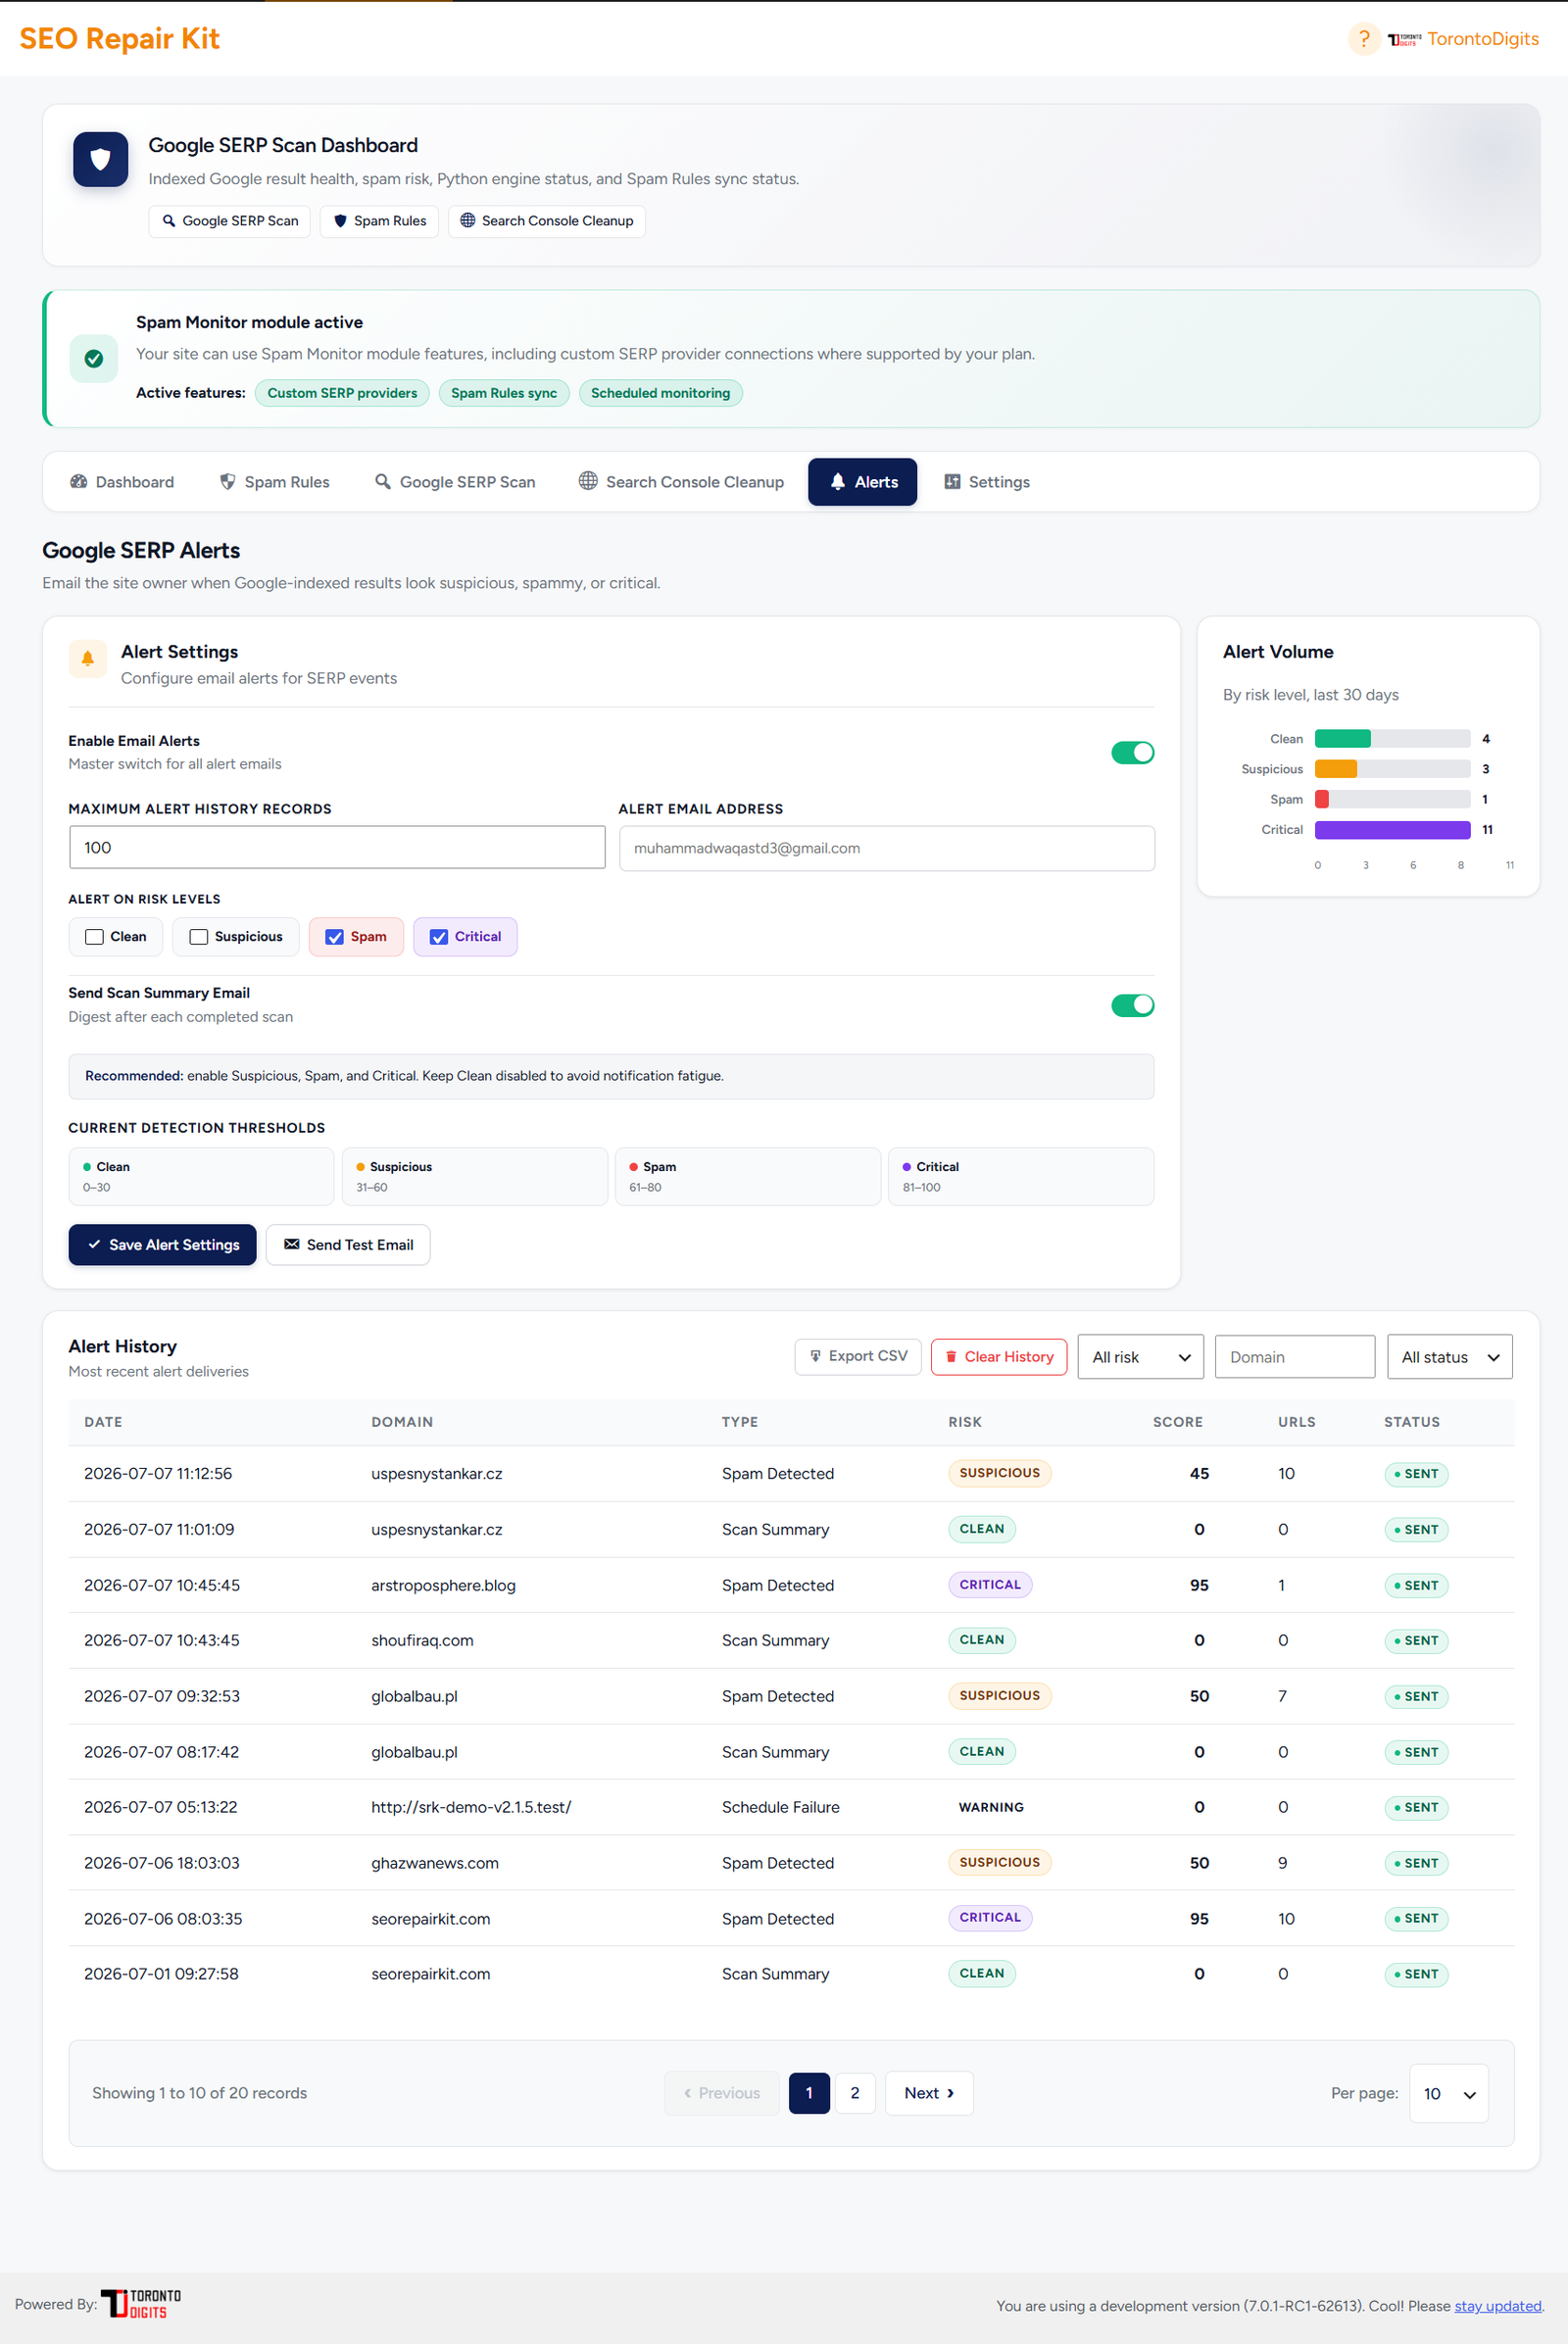
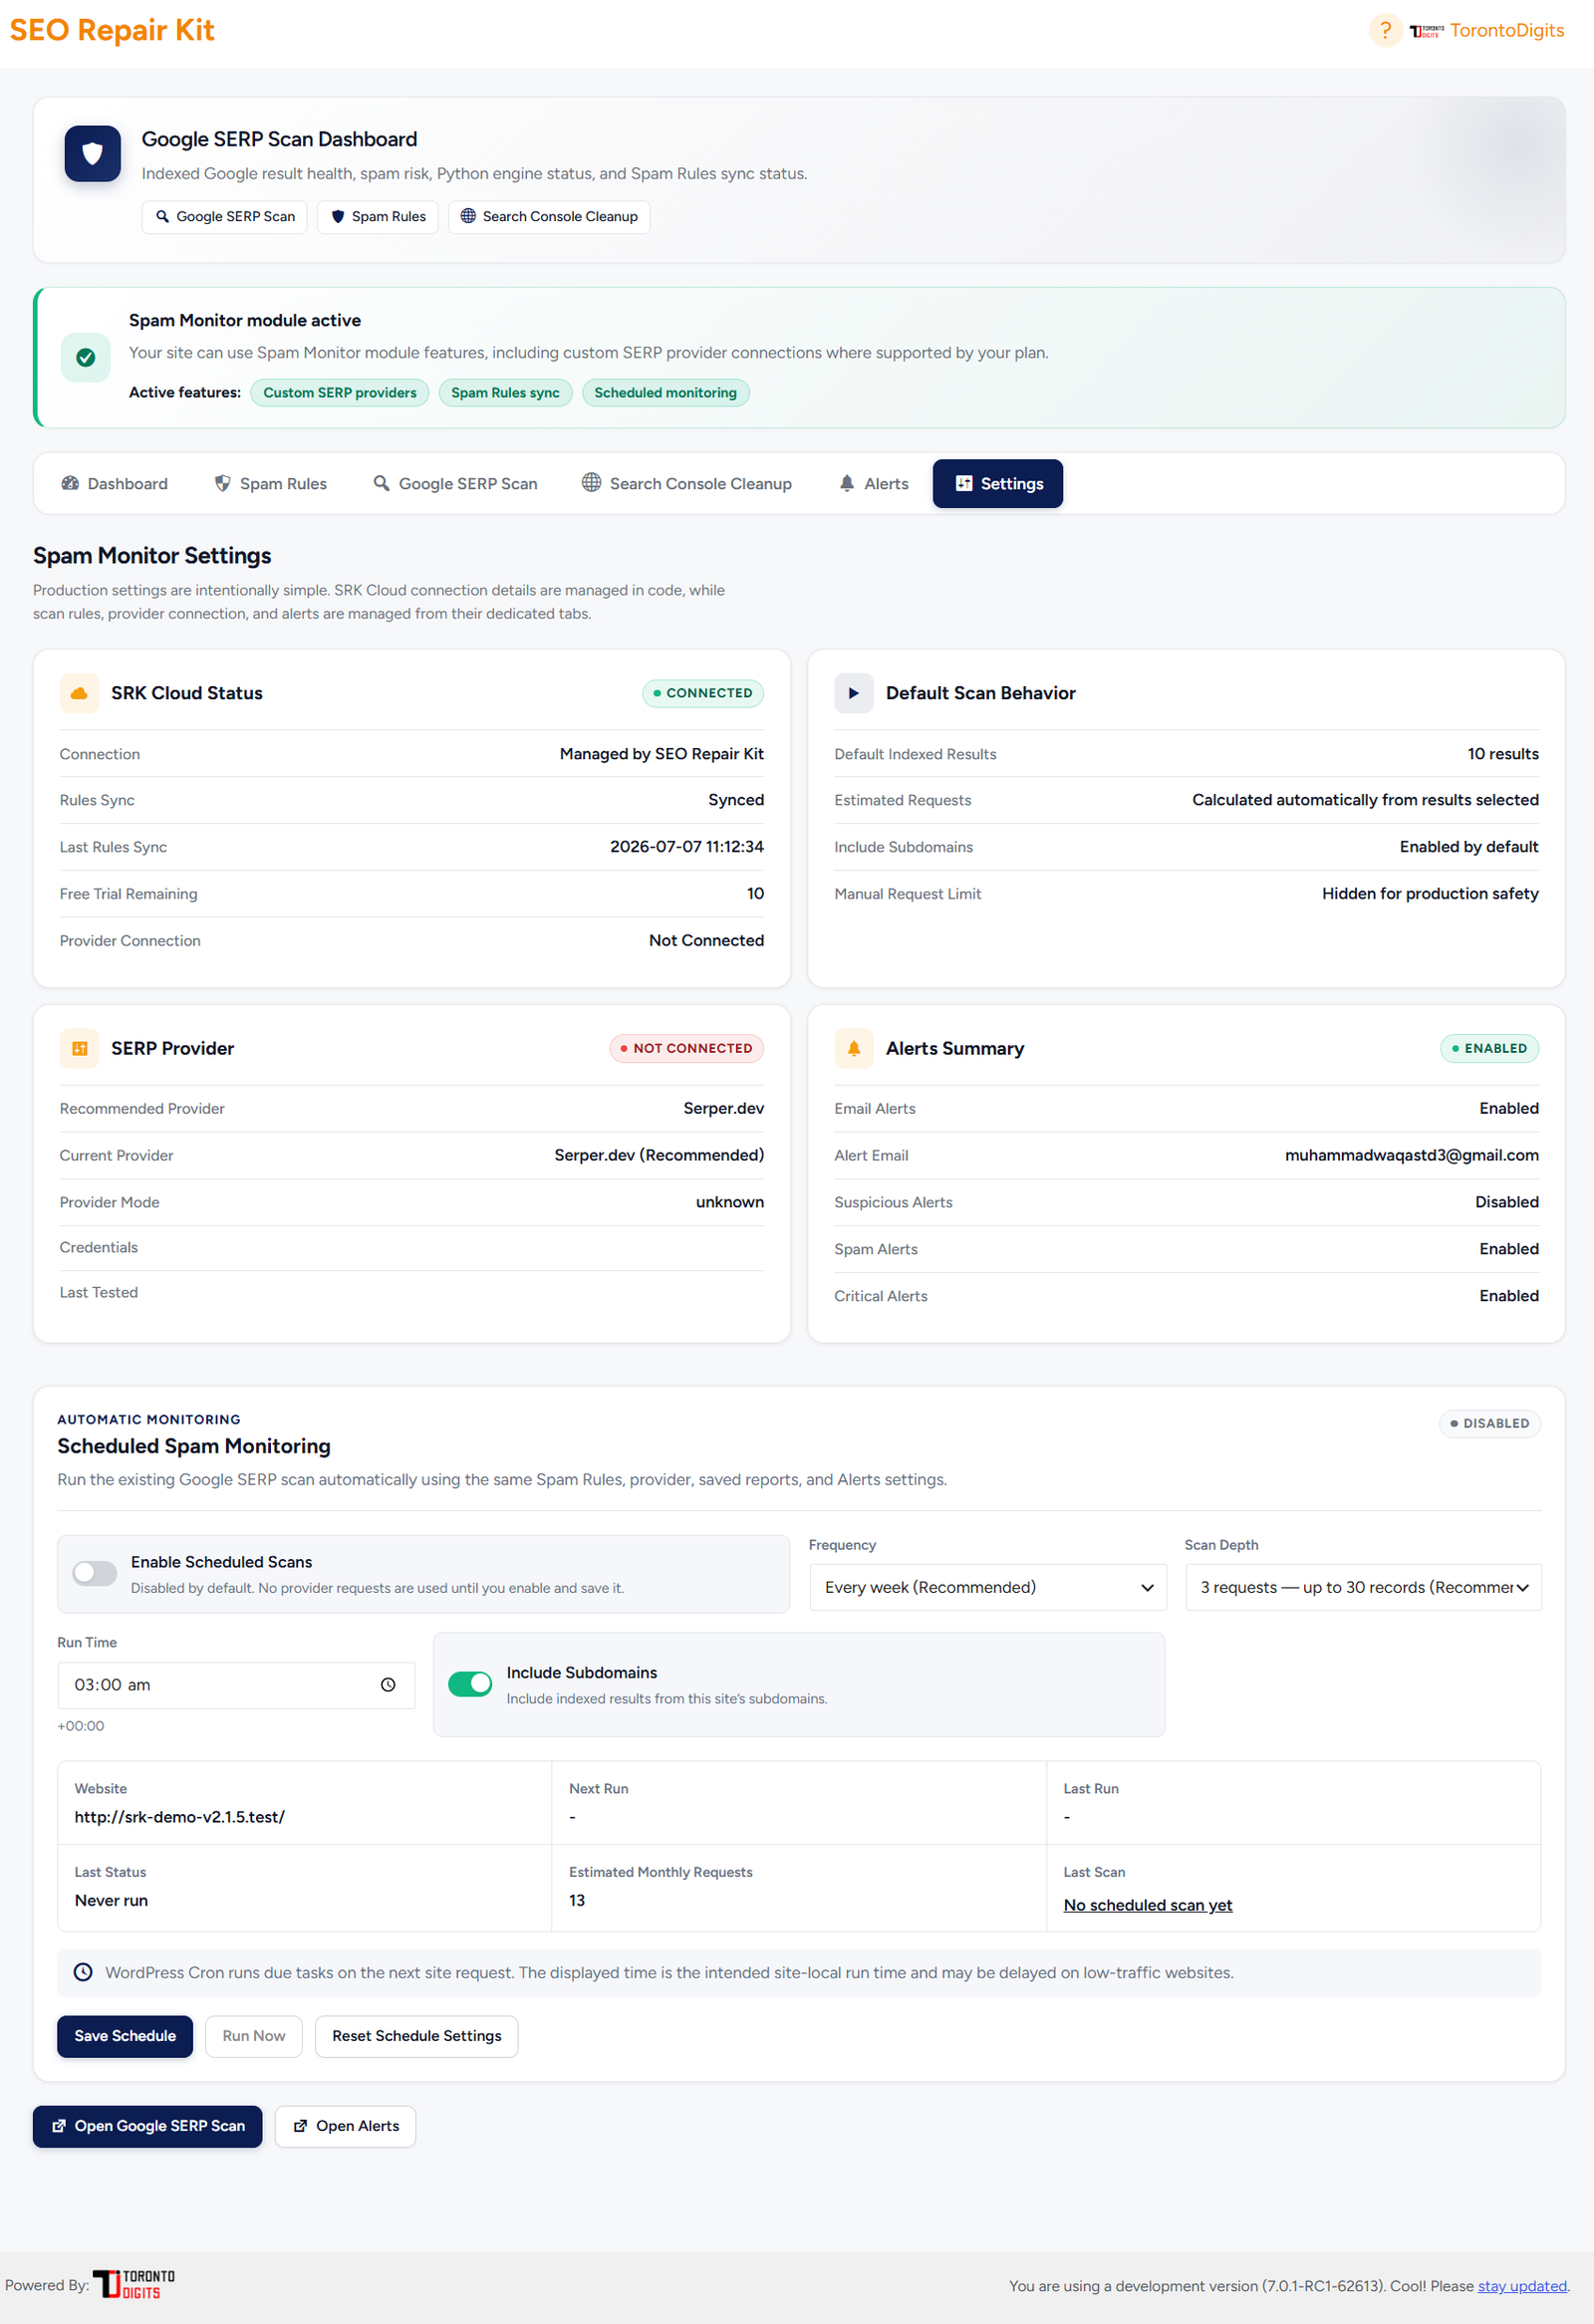
Auto Scan allows SEO Repair Kit to run link scans automatically according to a schedule.
You can configure:
- Scan interval
- Internal or external link scope
- Scan coverage
- Post types
- Batch size
- Maximum links per post
- HTTP timeout
- Email alerts
This is useful when you want SEO Repair Kit to continue checking your website without manually starting every scan.
Set Up Automatic Link Scanning →
Notifications
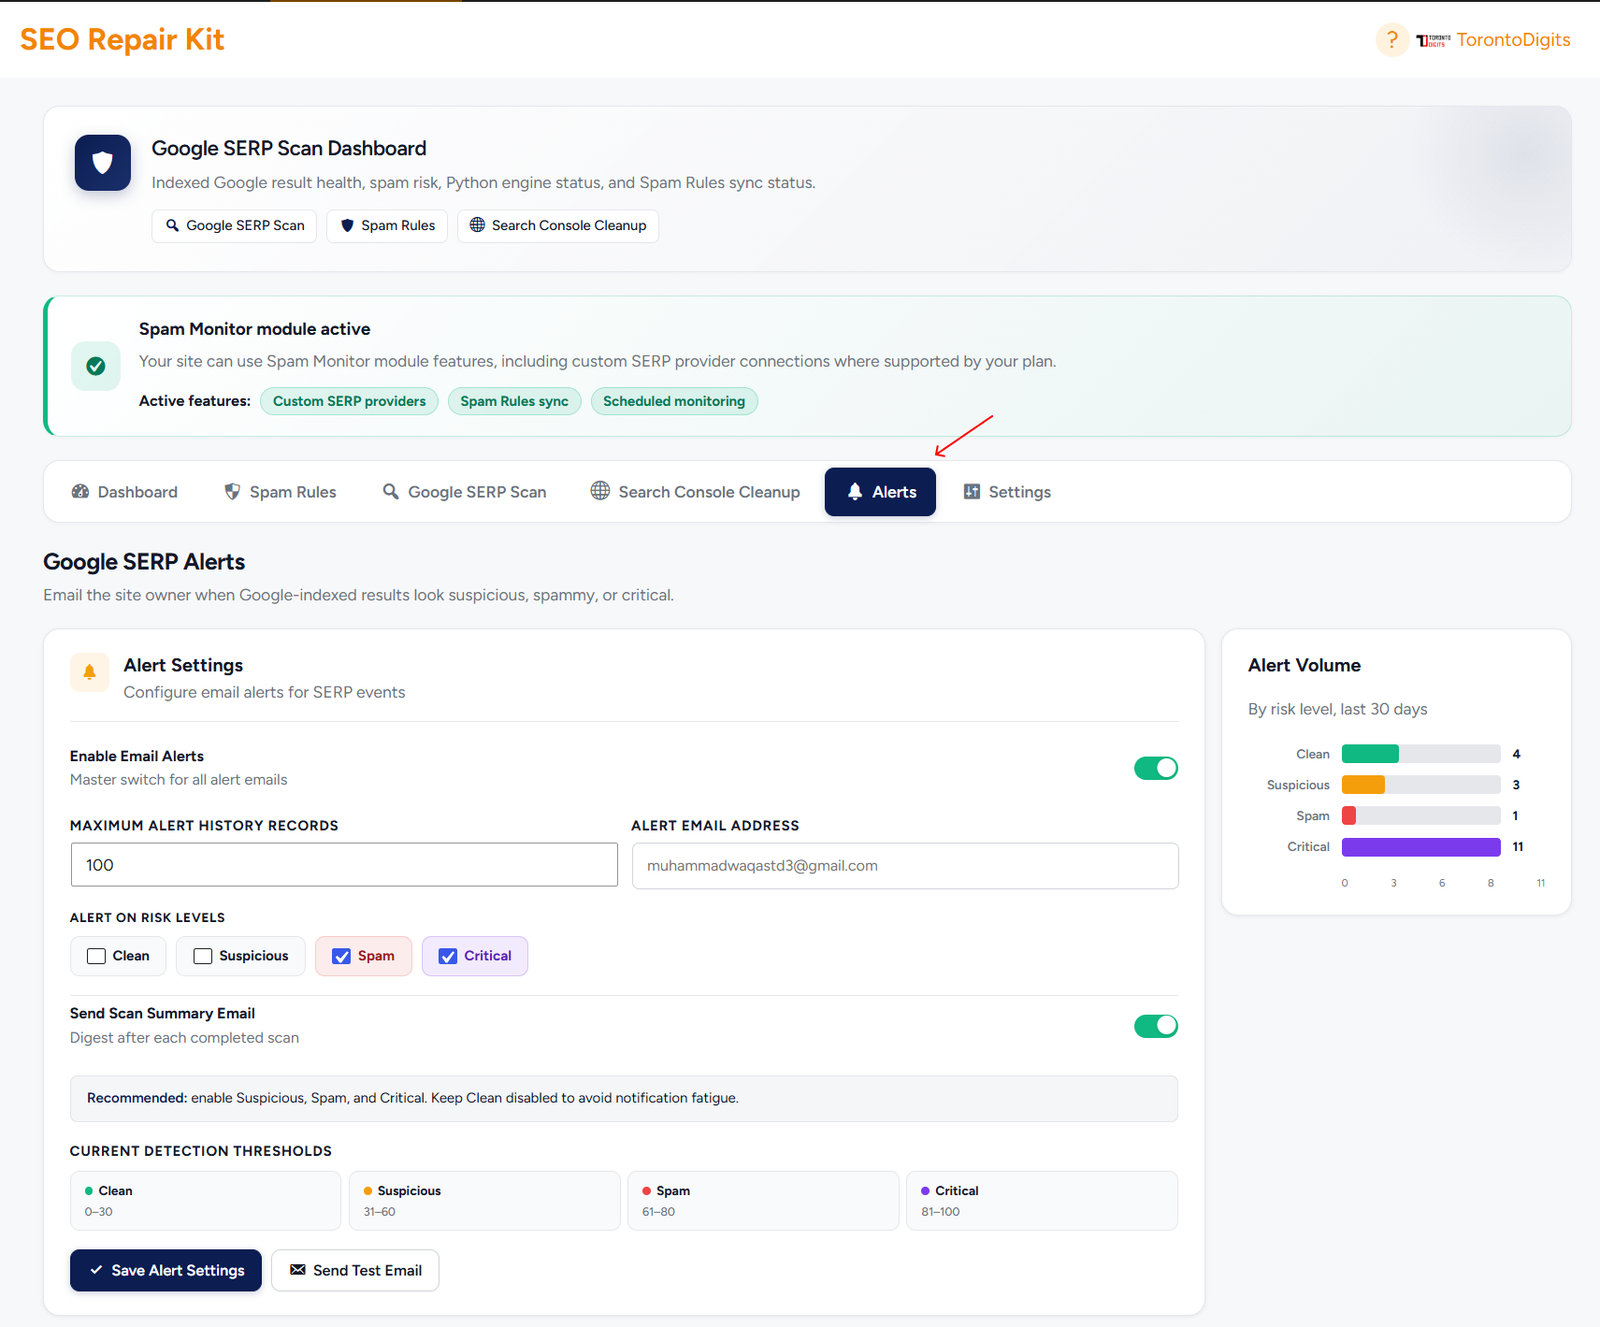
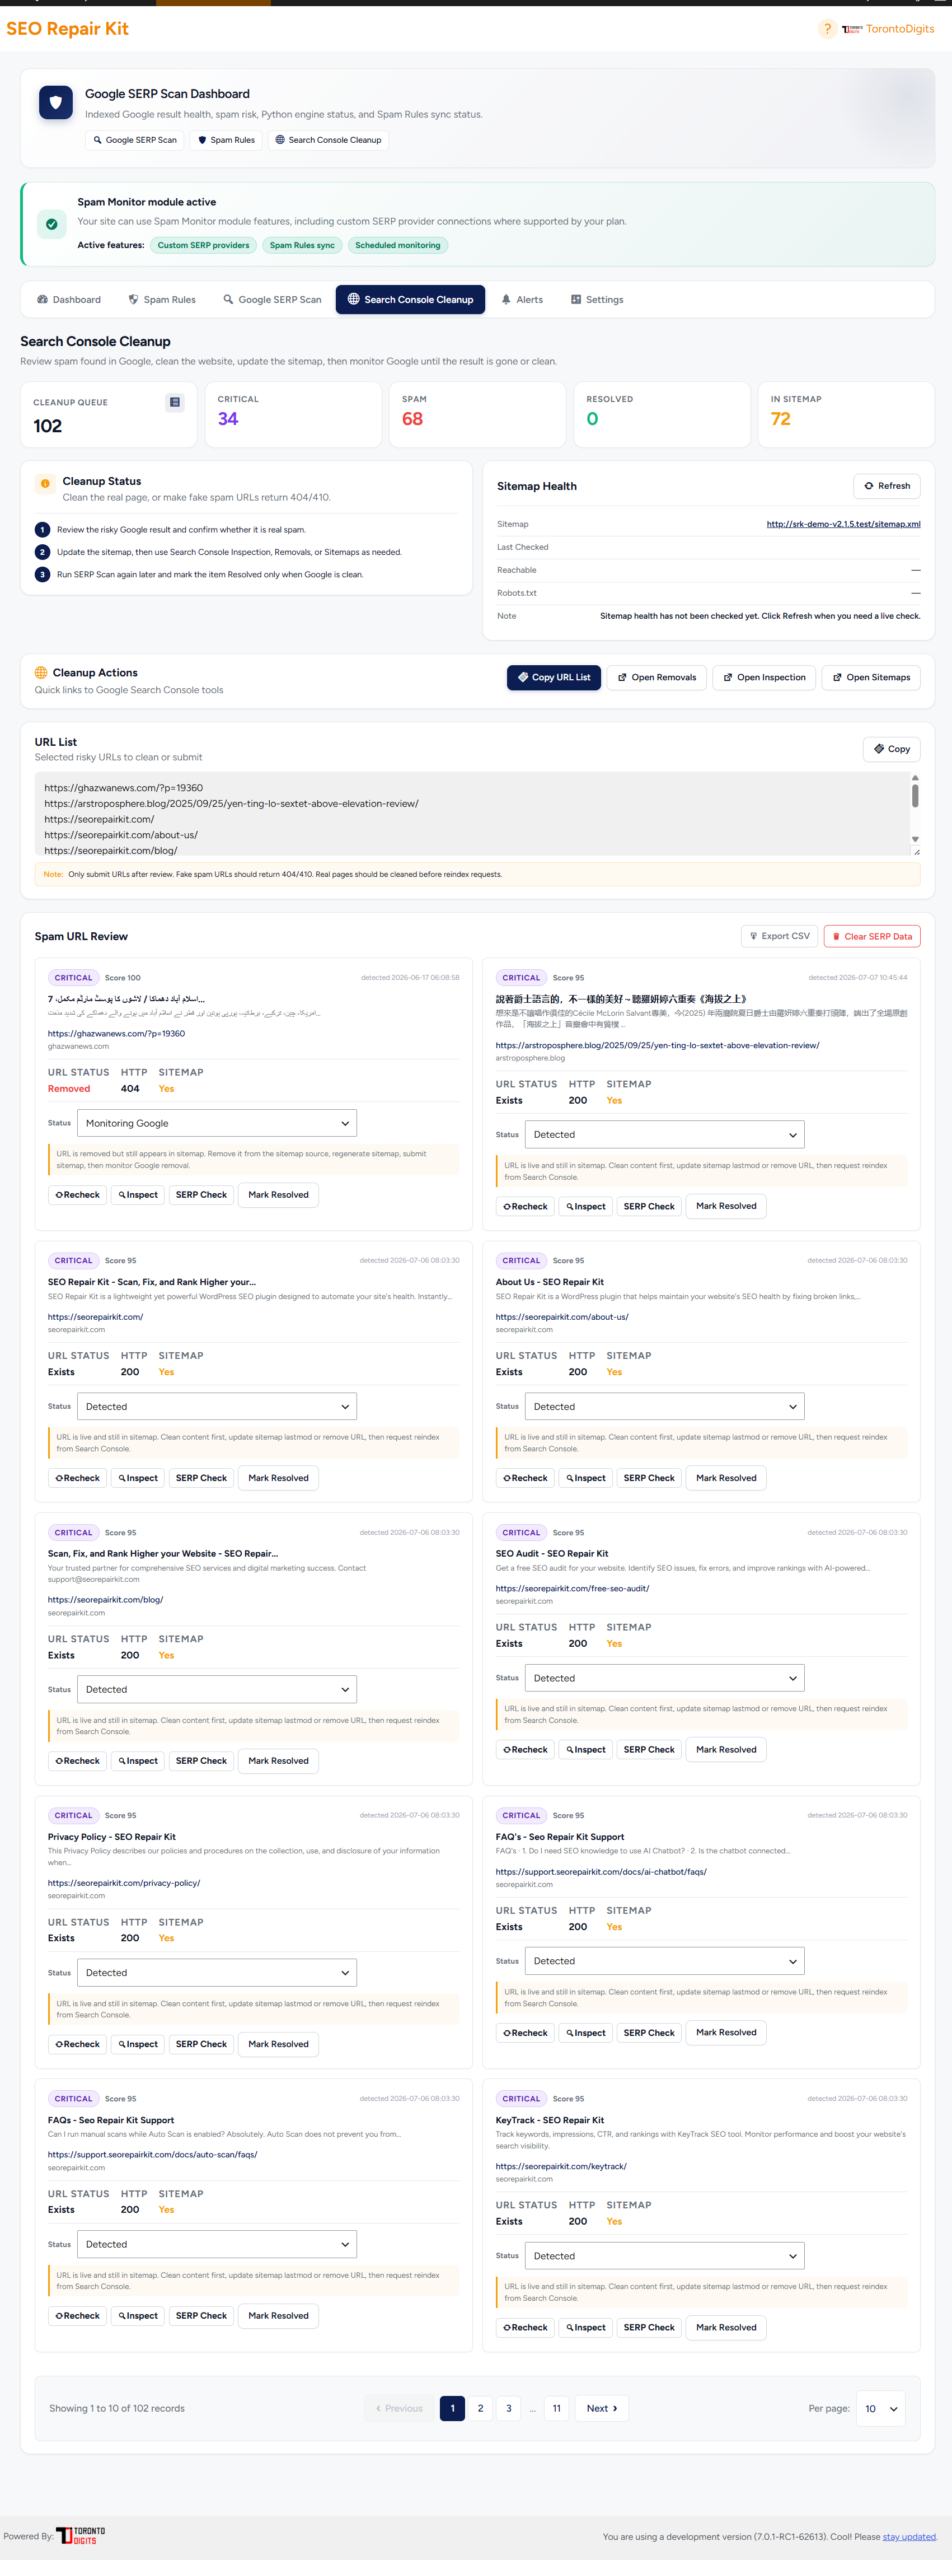
The Notifications tab gives you a record of link scan activity and broken-link email alerts.
It contains two main areas:
Scan Run History
Shows recent manual and scheduled scans, including the scan trigger, scope, coverage, number of scanned posts, total links, and broken links.
Notification History
Shows email notifications previously sent for broken-link alerts.
View Scan & Notification History →
Smart Redirects
Smart Redirects can automatically create 301 redirects for eligible broken internal singular URLs detected during a scan.
For supported post types, a broken URL can be redirected to the corresponding post-type archive.
For example:
/blog/deleted-post/ → /blog/
Smart Redirect records can be reviewed and managed from the Smart Redirects tab.
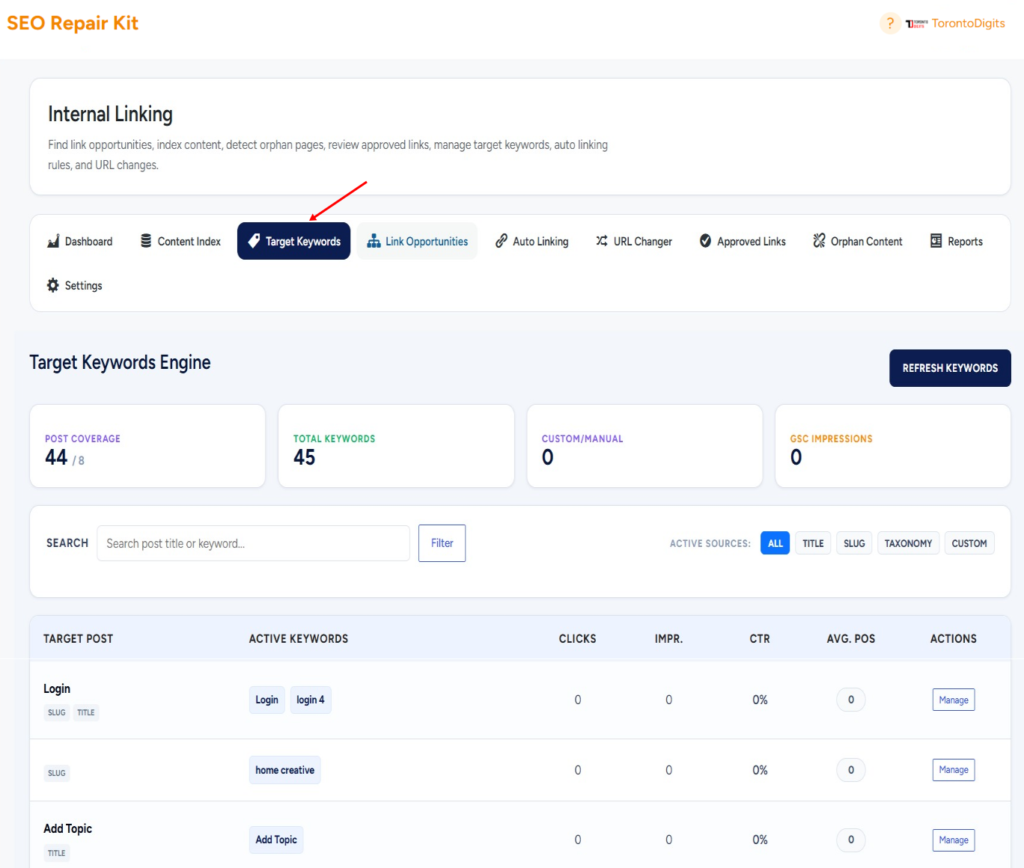
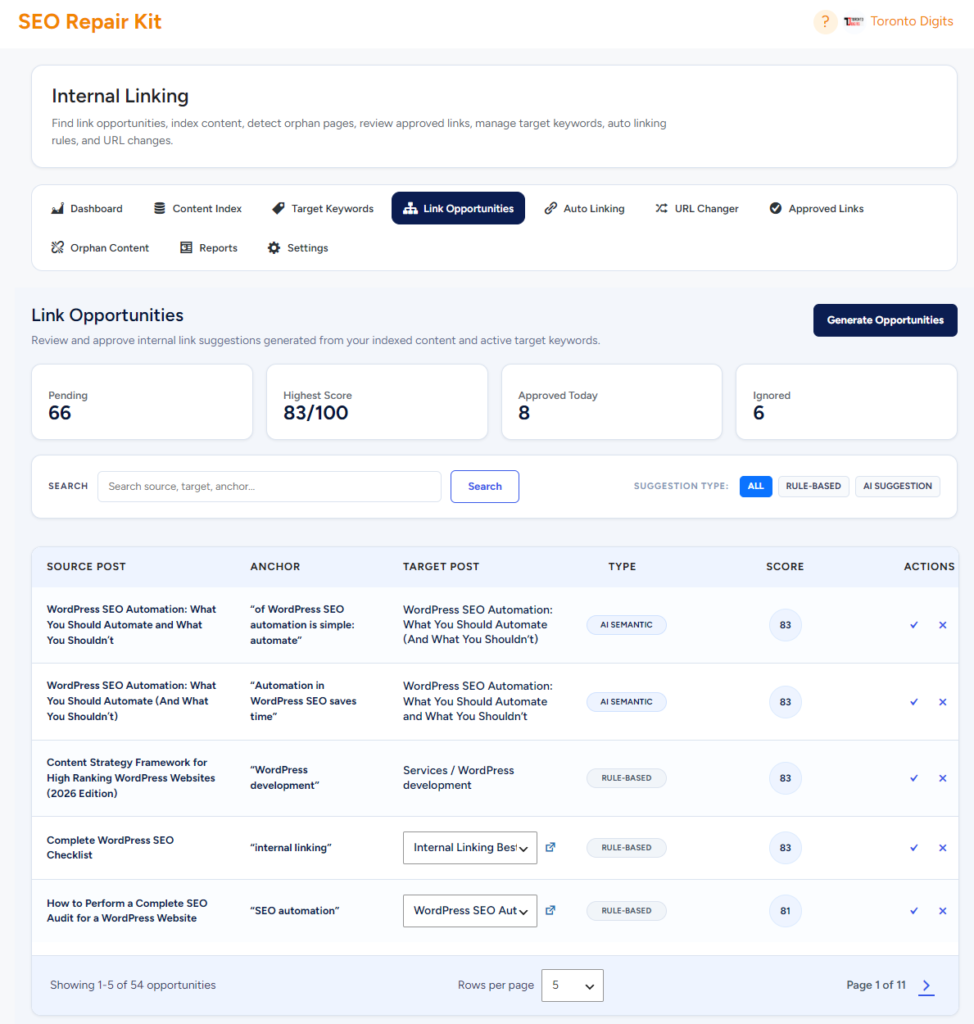
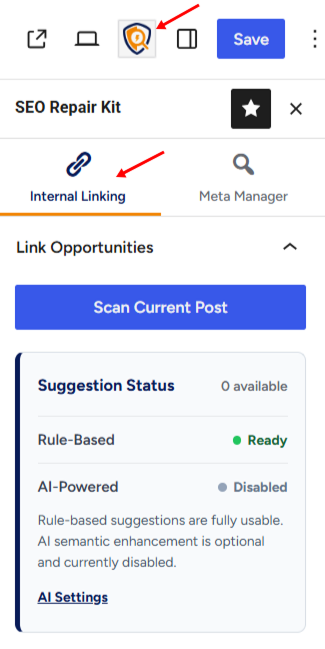
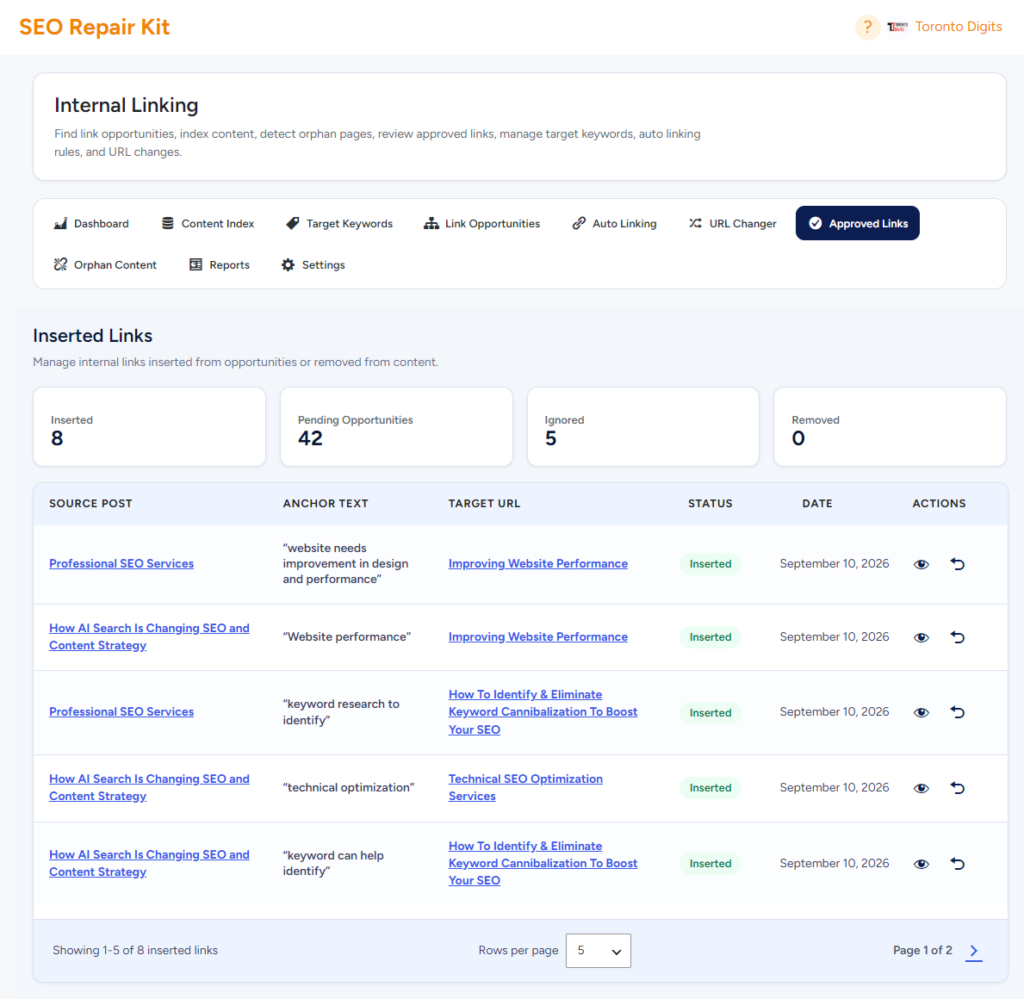
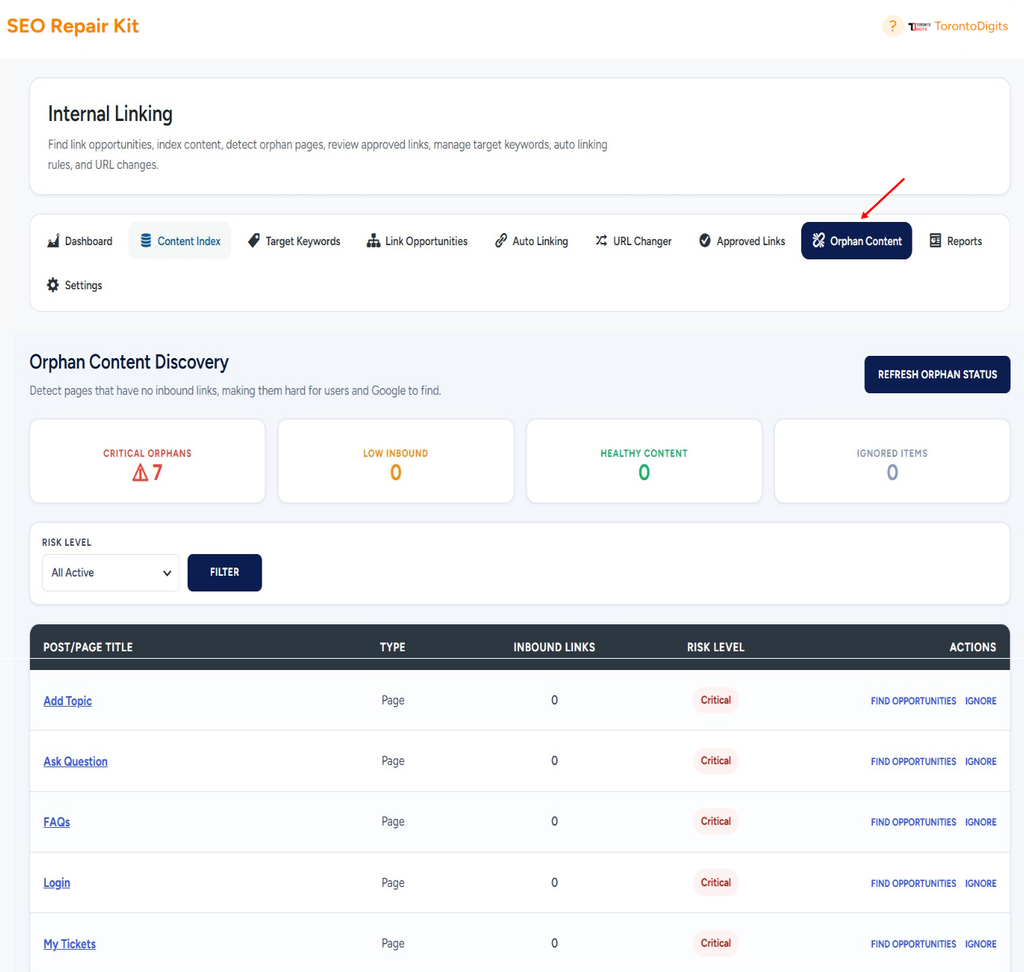
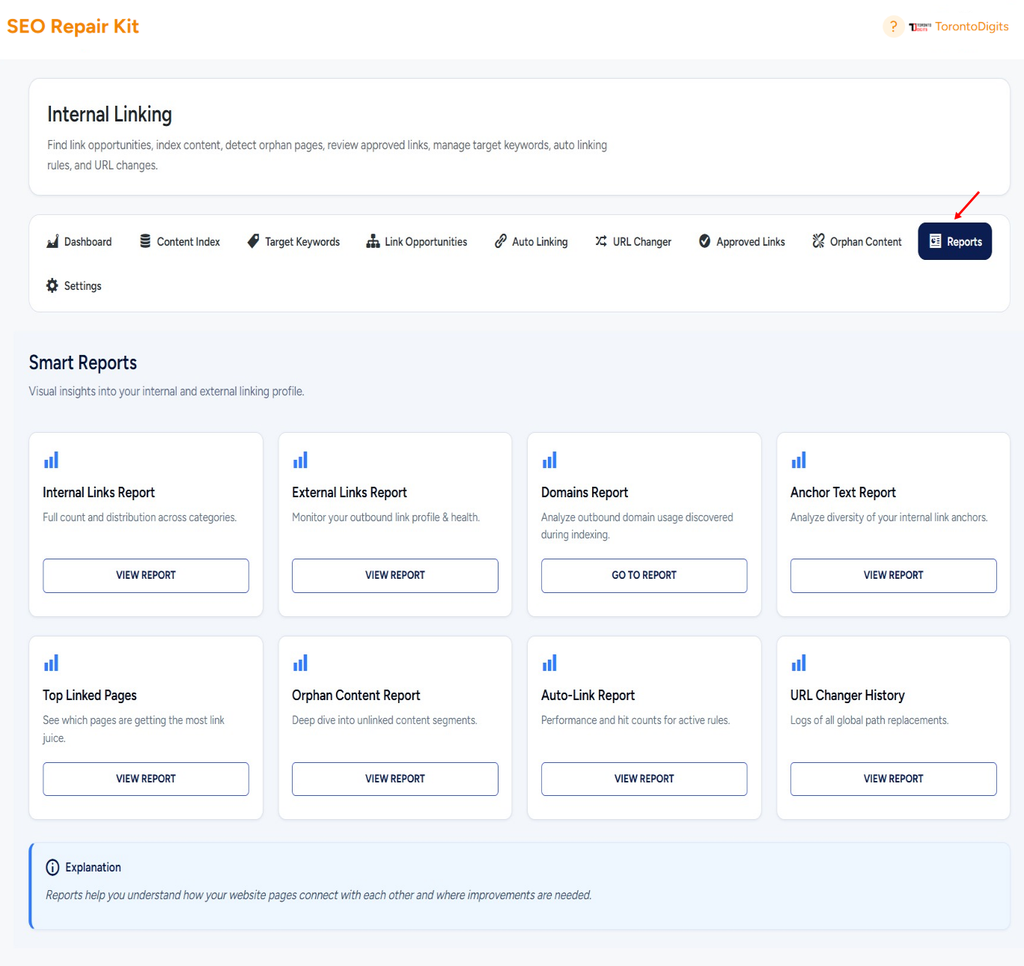
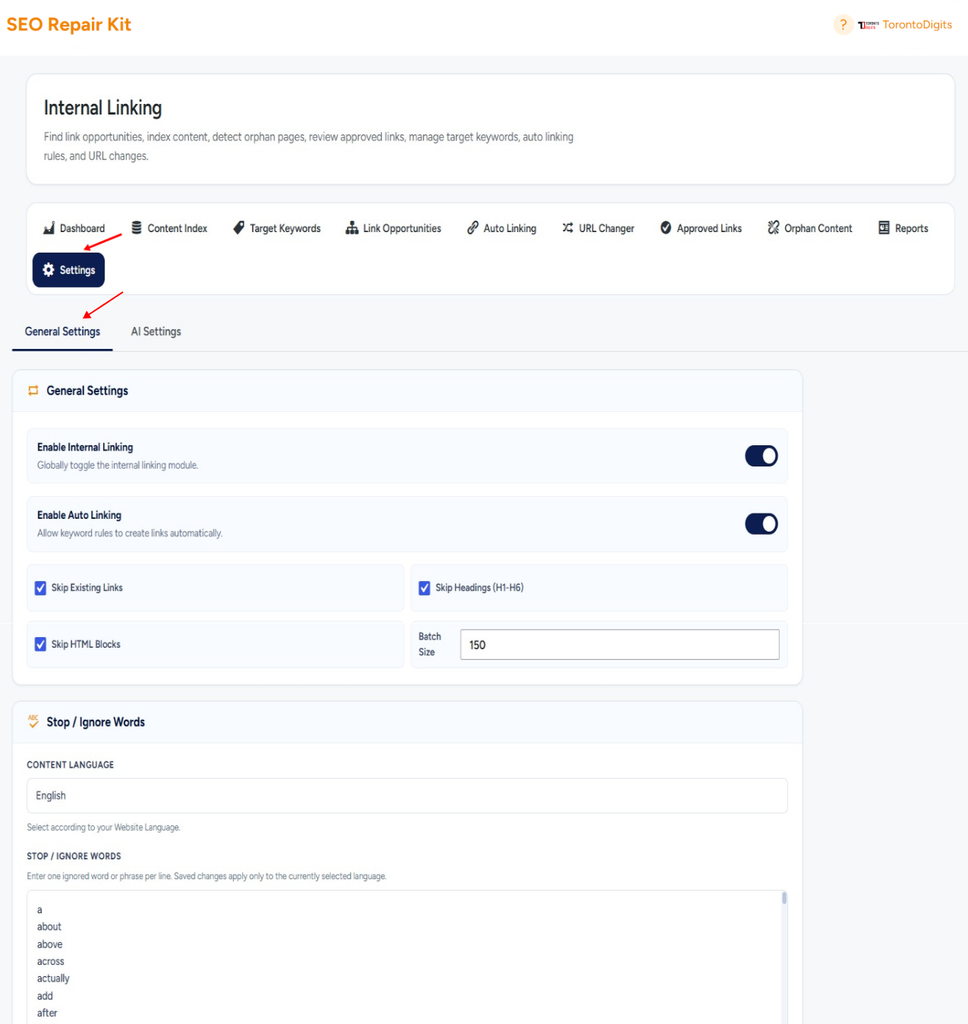
Internal Linking
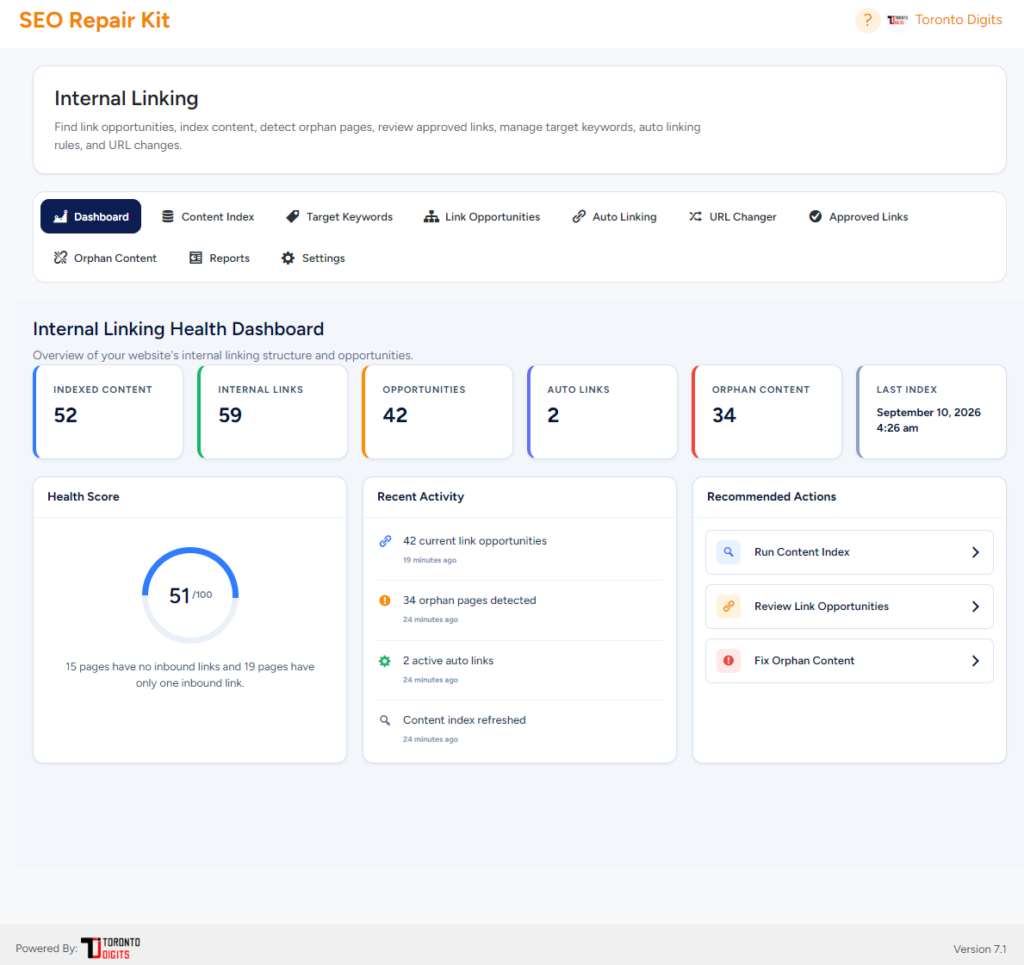
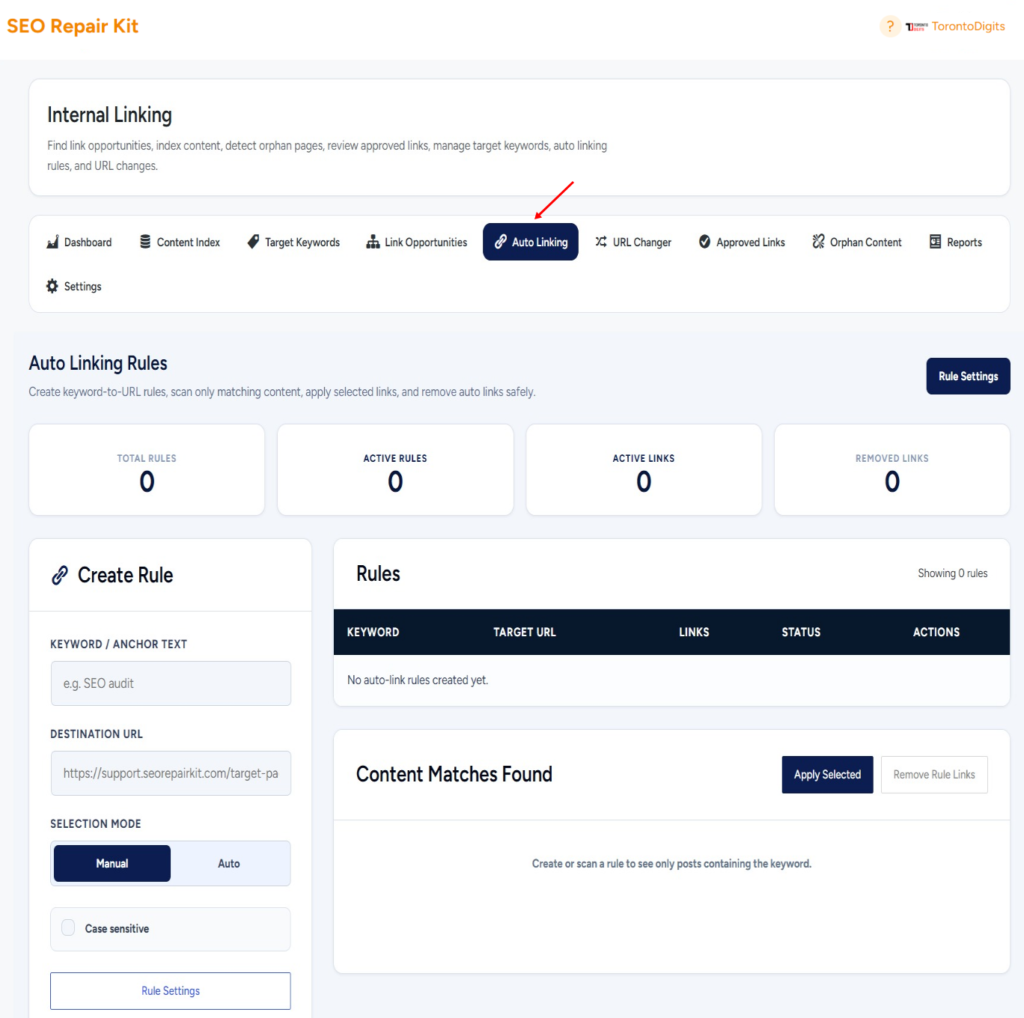
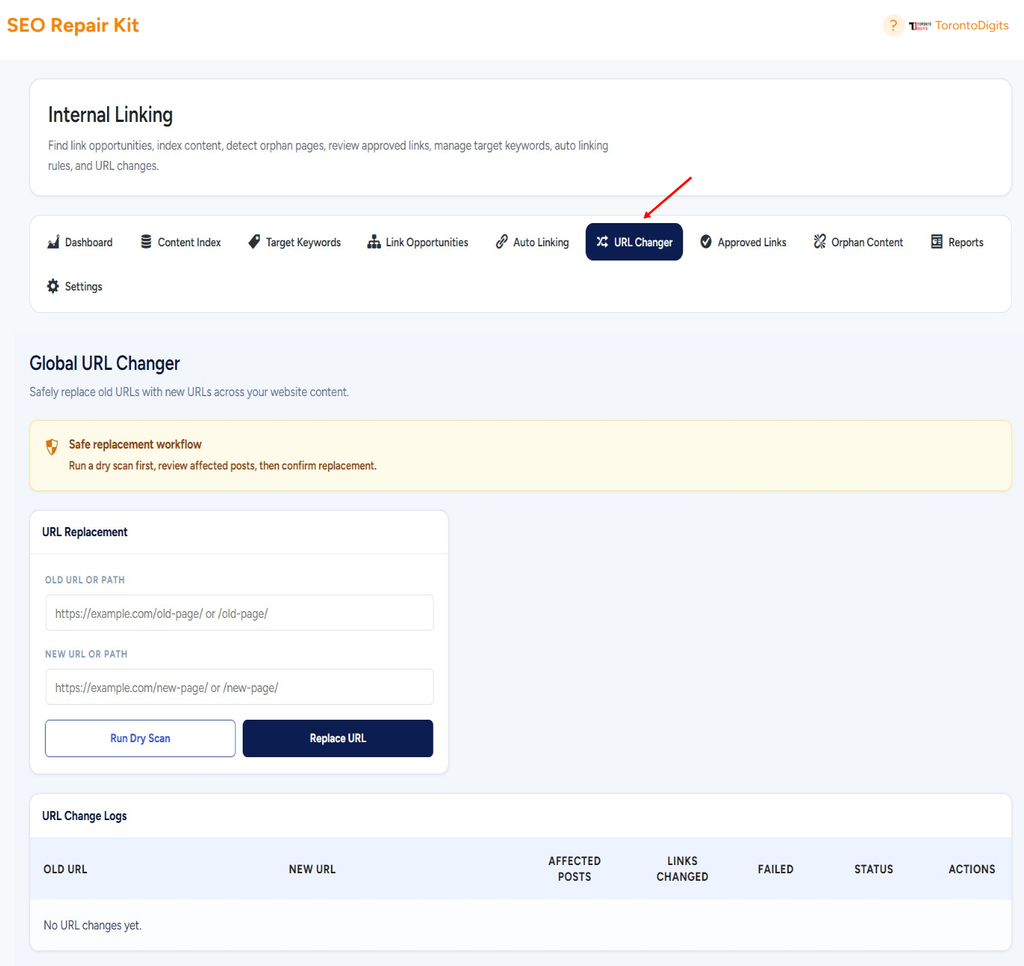
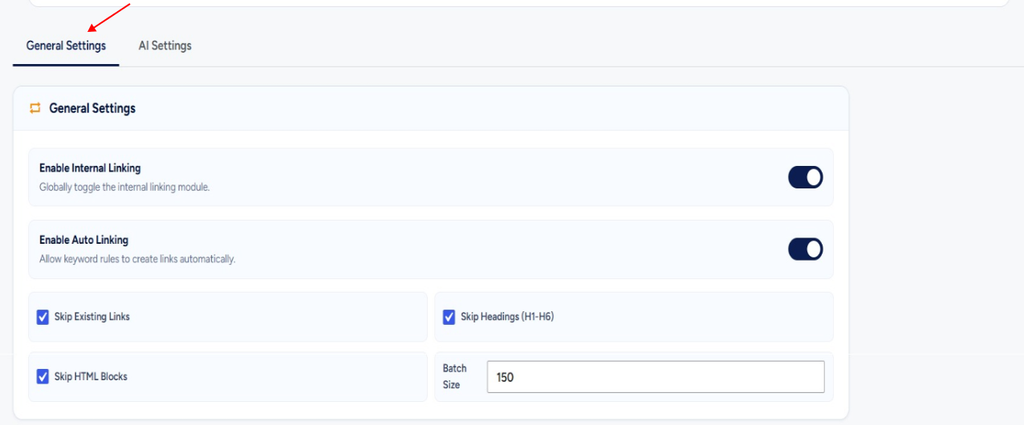
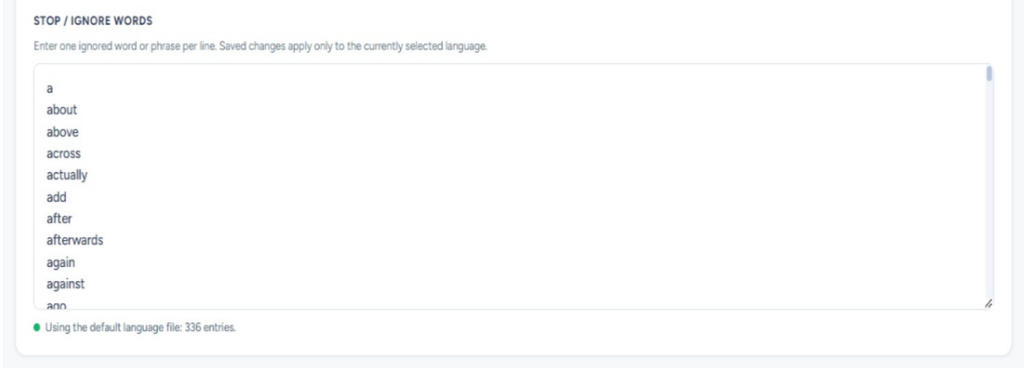
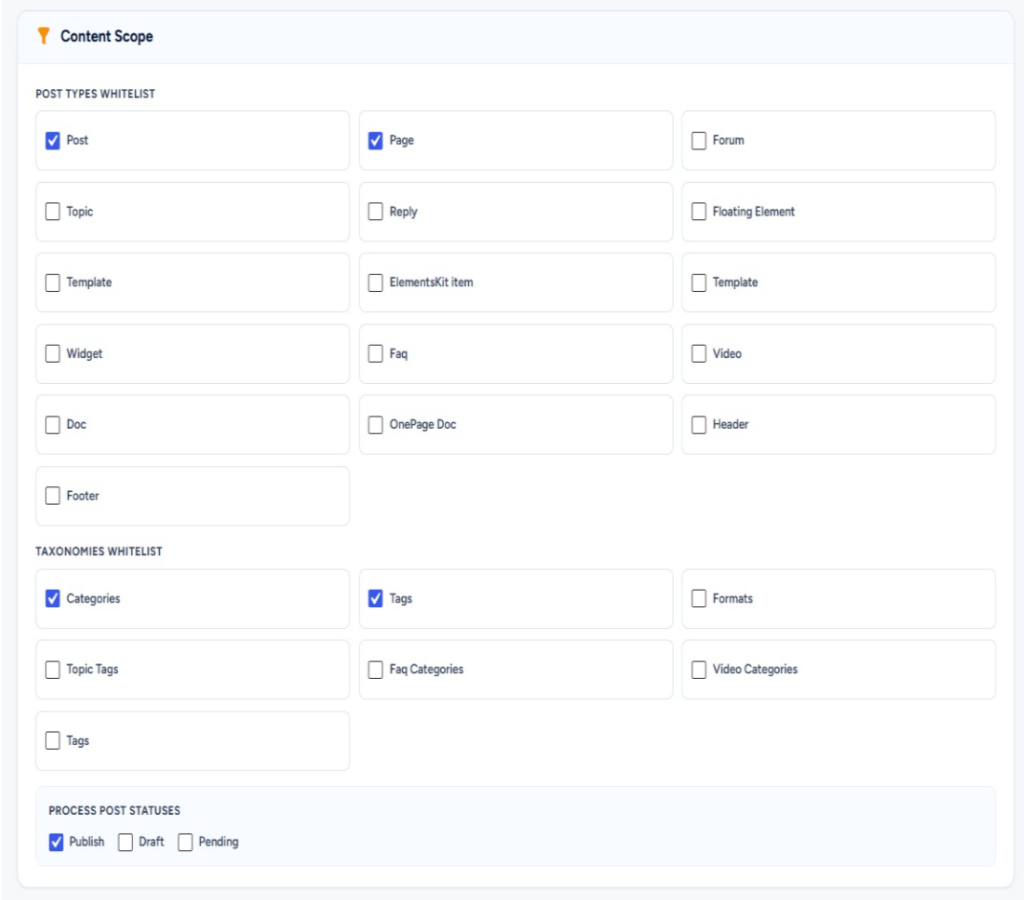
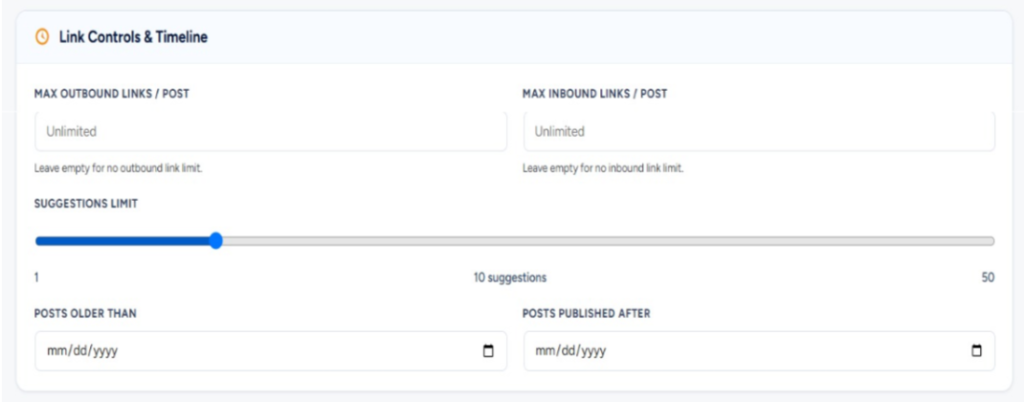
The Internal Linking area provides SEO Repair Kit’s tools for improving links between content on your own website.
Because Internal Linking includes its own workflow and settings, it has separate documentation.
Where Should I Start?
If you are using Links Manager for the first time, start with a manual Links Scan.
This gives you an initial view of the links found in your content and helps identify links that may need attention.
1.2 Scan Your Website for Broken Links
SEO Repair Kit’s Links Scan helps you check links across your WordPress content and identify broken links that may affect visitors and your website’s SEO.
In this guide, you’ll learn how to run a link scan, review the results, fix or redirect broken links, and export your scan report.
How to run a link scan
Follow the steps below to scan your website content for broken links.
1. Open Links Manager
In your WordPress Dashboard, go to:
SEO Repair Kit → Links Manager
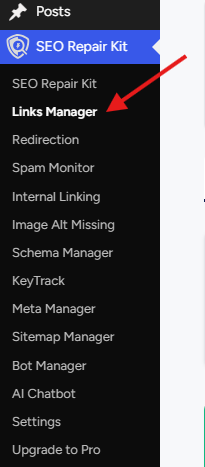
2. Click Links Scan
At the top of the Links Manager, click the Links Scan tab.
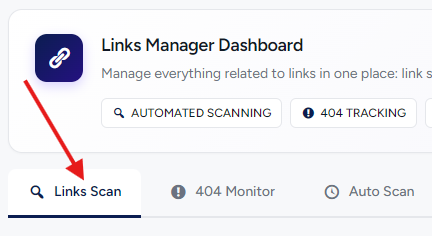
The Links Scan dashboard shows an overview of your website’s link health.
Step 3: Select the Post Types You Want to Scan
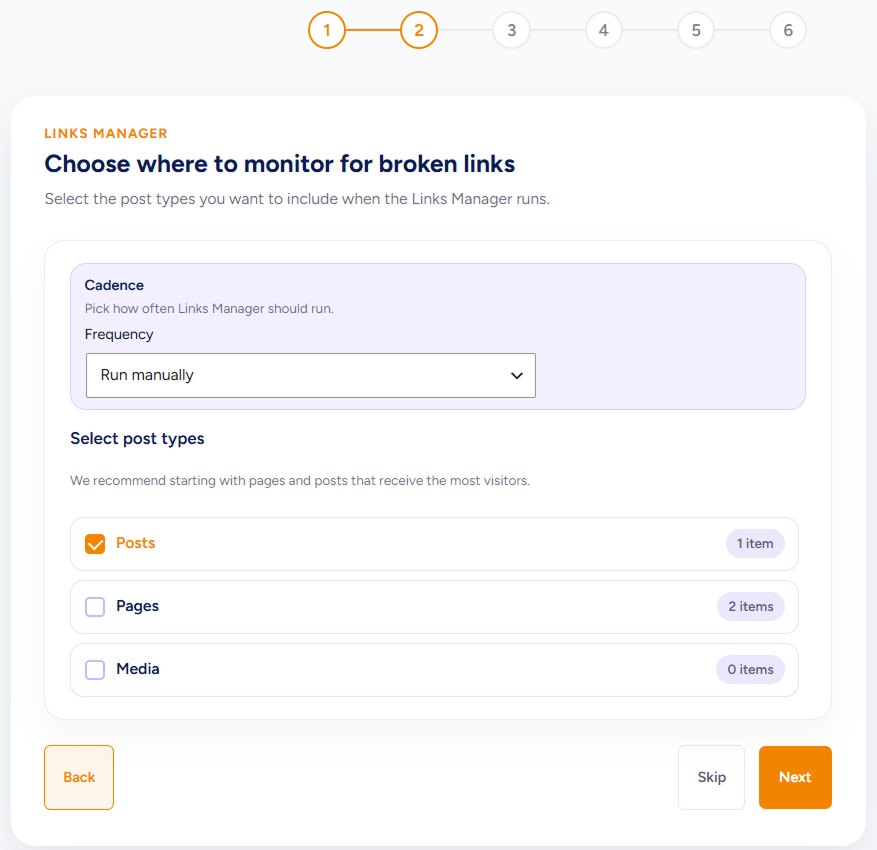
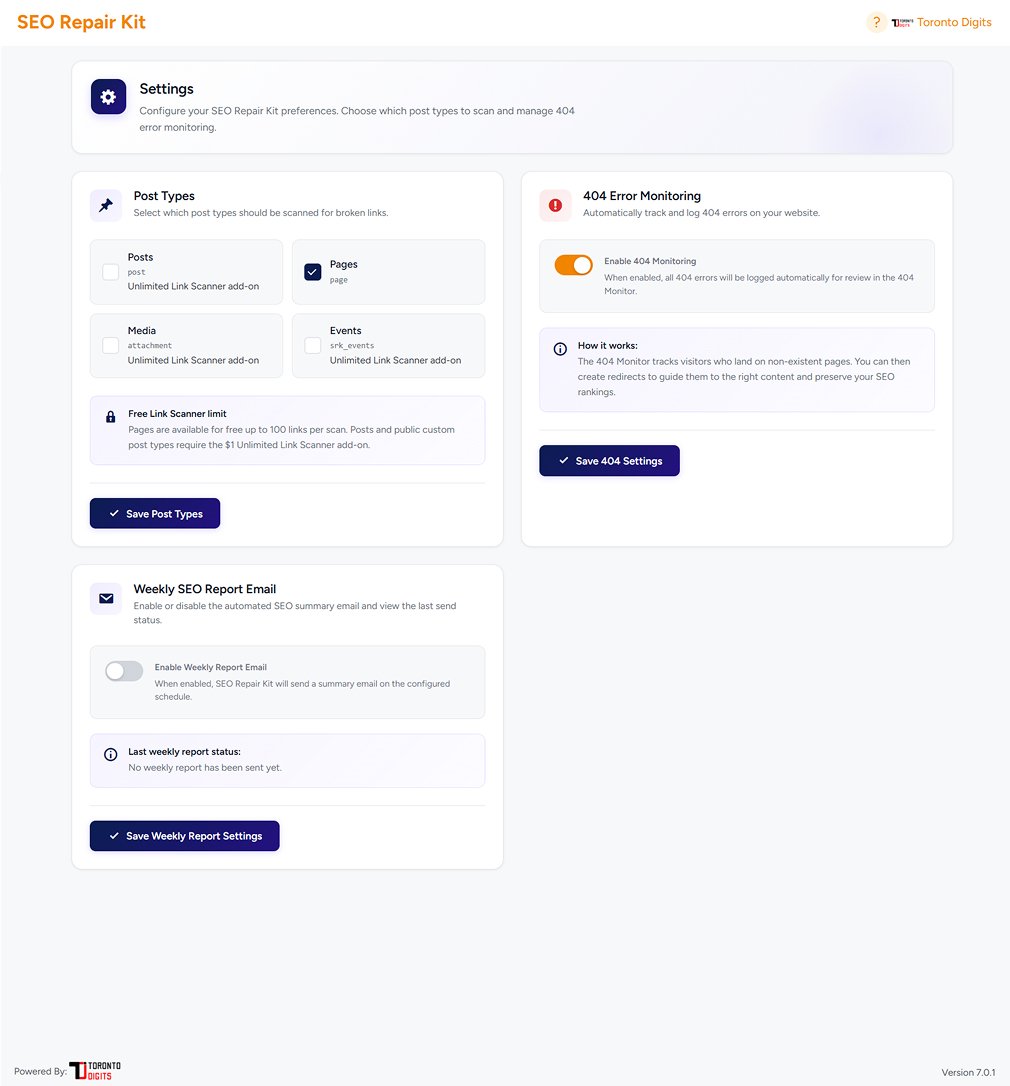
Before running a link scan, choose which post types SEO Repair Kit should include in link scanning.
From the Links Scan tab, click Settings.
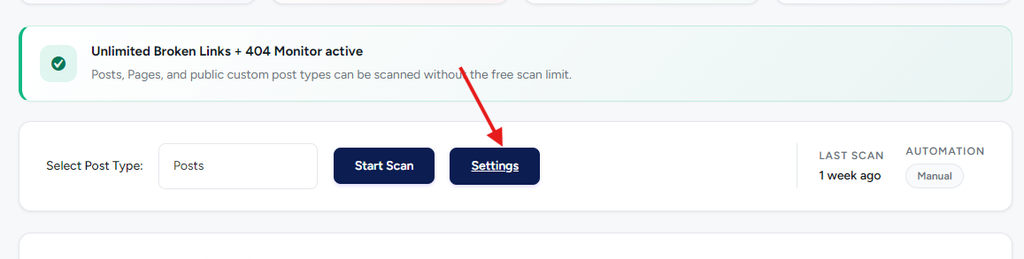
The Settings page will open.
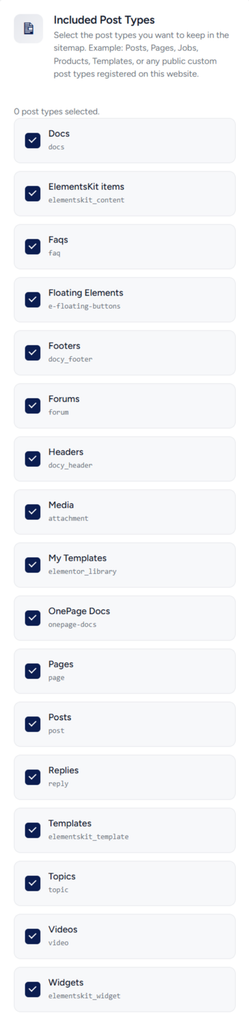
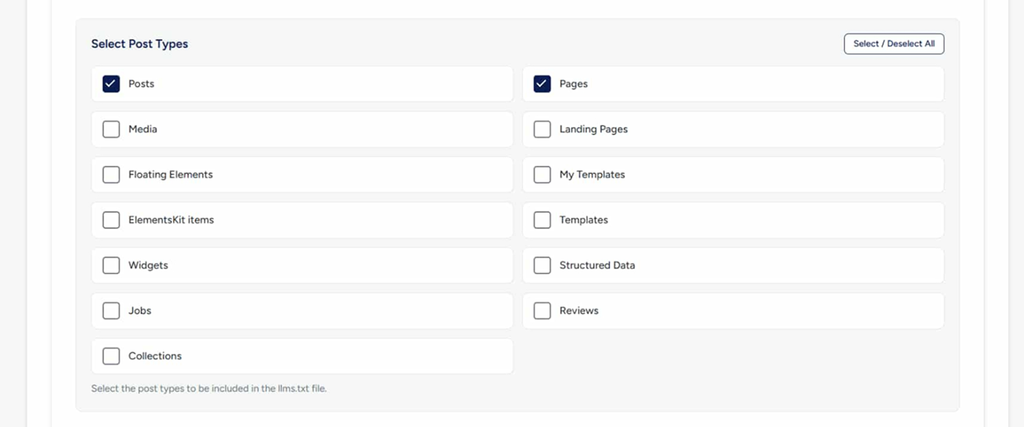
Under Post Types, select the content types you want SEO Repair Kit to scan for broken links.
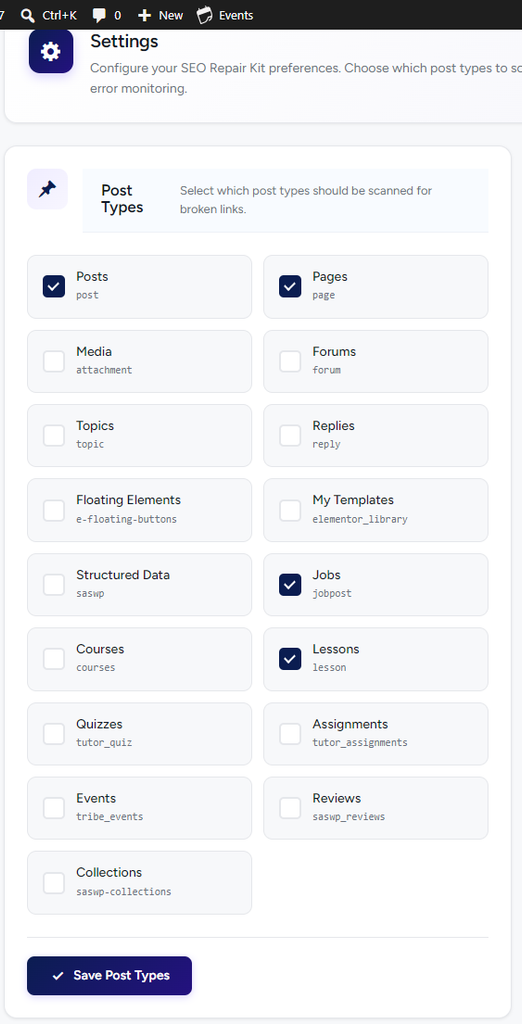
Available post types depend on the content registered on your WordPress website. These may include Posts, Pages, Media, and other custom post types added by your theme or plugins.
1. Select the required post types
Click the checkbox next to each post type you want to include in link scanning.
For example, you can select Posts and Pages if you want SEO Repair Kit to check links within your standard website content.
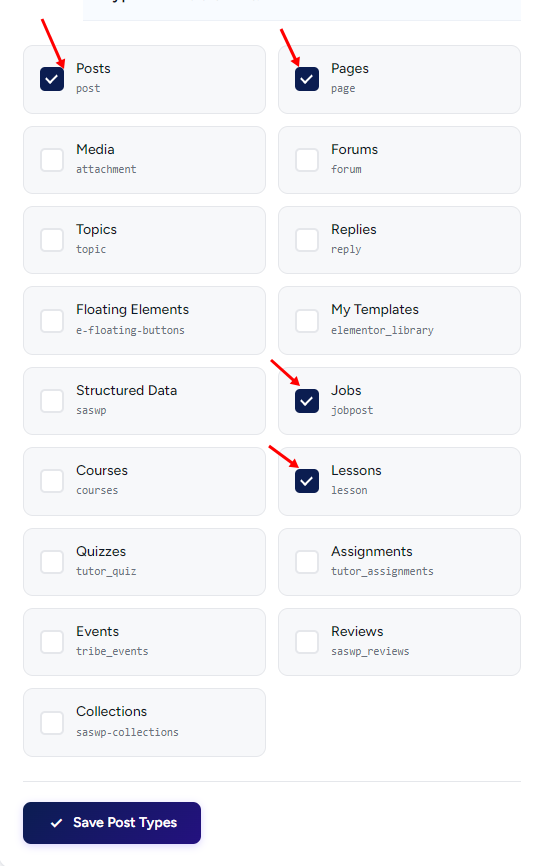
You can select multiple post types based on the content you want to monitor.
2. Save your post types
After making your selections, click Save Post Types.
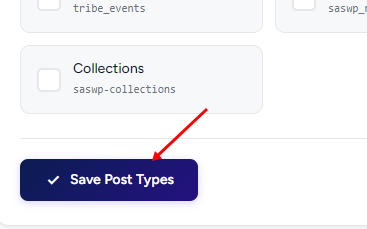
Your selected post types are now saved and available for link scanning.
3. Return to Links Scan
Go back to:
SEO Repair Kit → Links Manager → Links Scan
You can now select the required configured content type and start your link scan.
Next, choose the post type you want to check and click Start Scan.
4. Select the post type you want to scan
Open the Select Post Type dropdown and choose the content you want SEO Repair Kit to scan.
Depending on your website, this may include Posts, Pages, or other public custom post types.
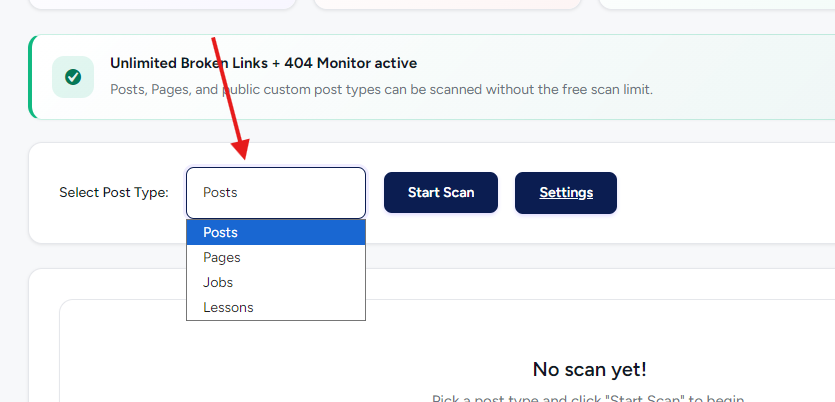
5. Click Start Scan
After selecting the post type, click Start Scan.
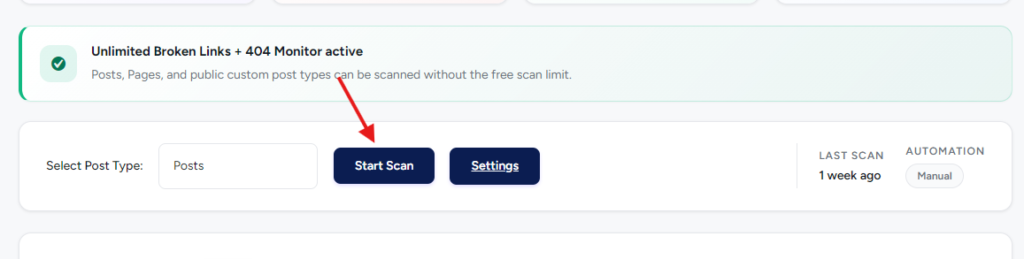
SEO Repair Kit will begin checking the links found in the selected content.
6. Wait for the scan to complete
While the scan is running, you can follow its progress on the Links Scan screen.
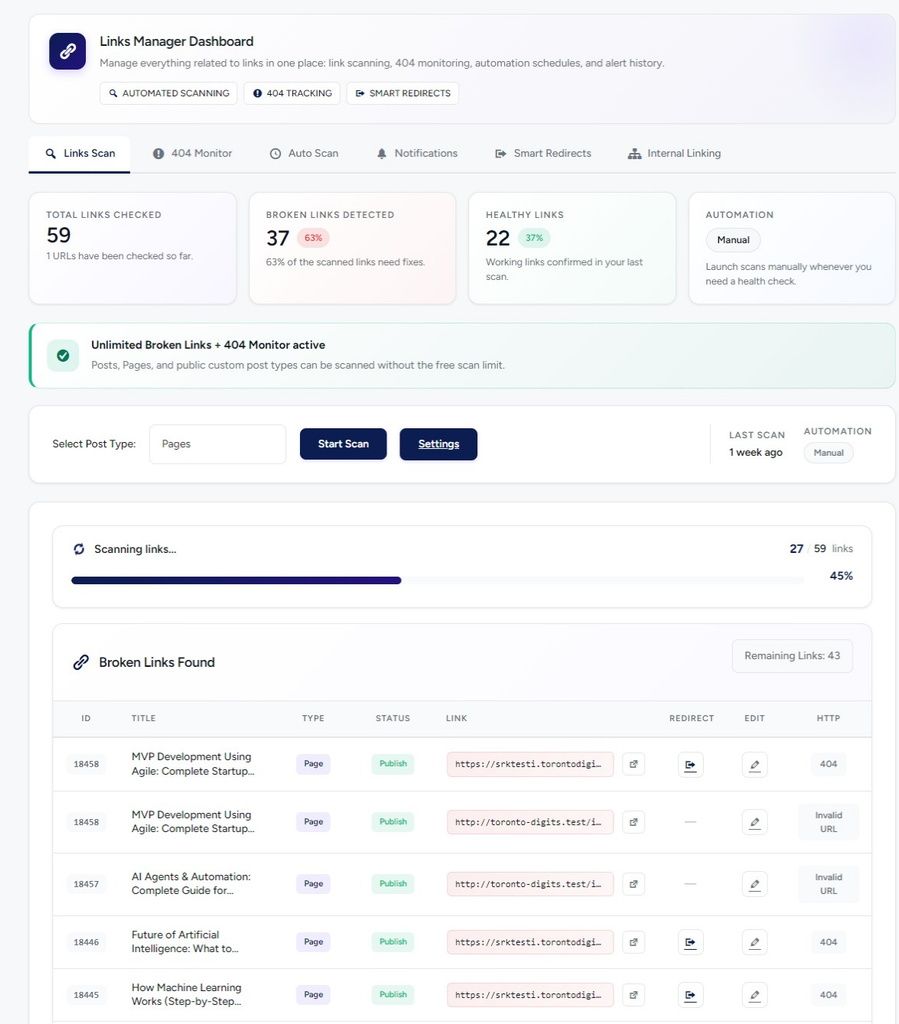
Wait until the scan has finished before reviewing the final results.
7. Review the broken links
When the scan is complete, scroll down to the Broken Links Found section.
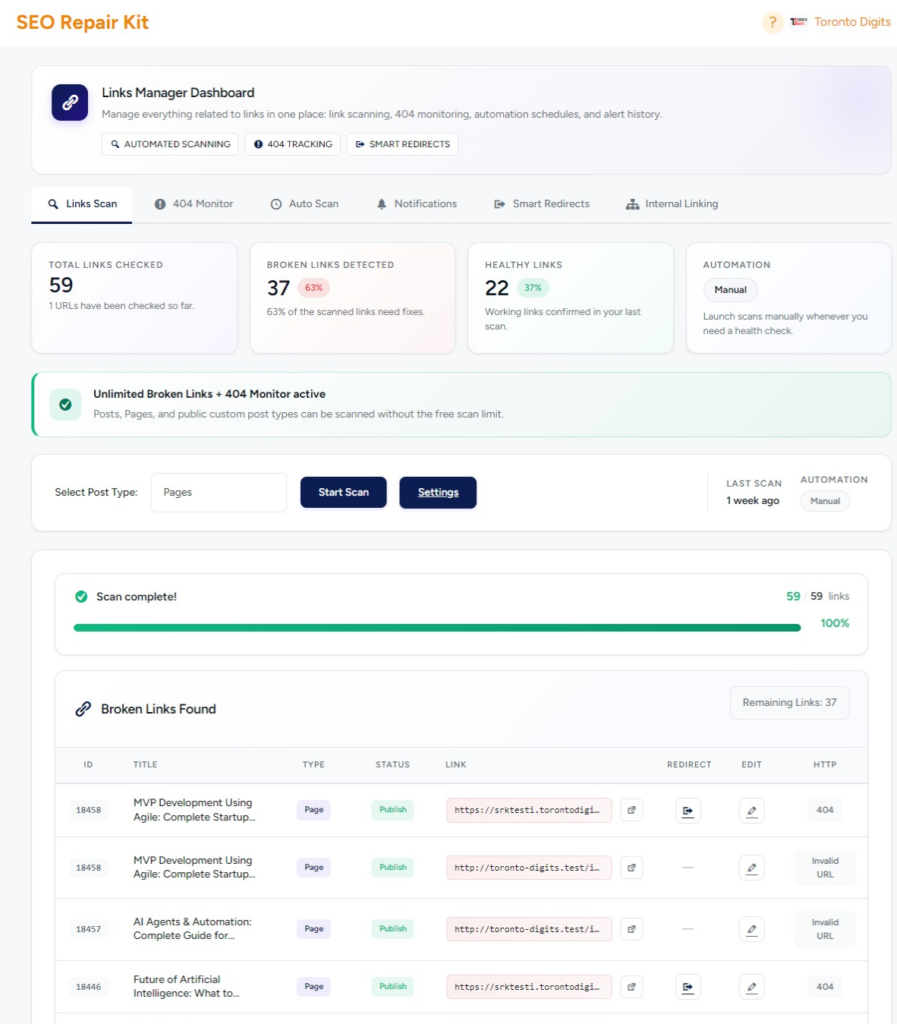
Here you can review the broken links detected during the scan.
Congratulations! You have completed your link scan. You can now review and resolve the detected link issues.
How to understand the Links Scan summary
The summary cards at the top of Links Scan give you a quick overview of your link health.
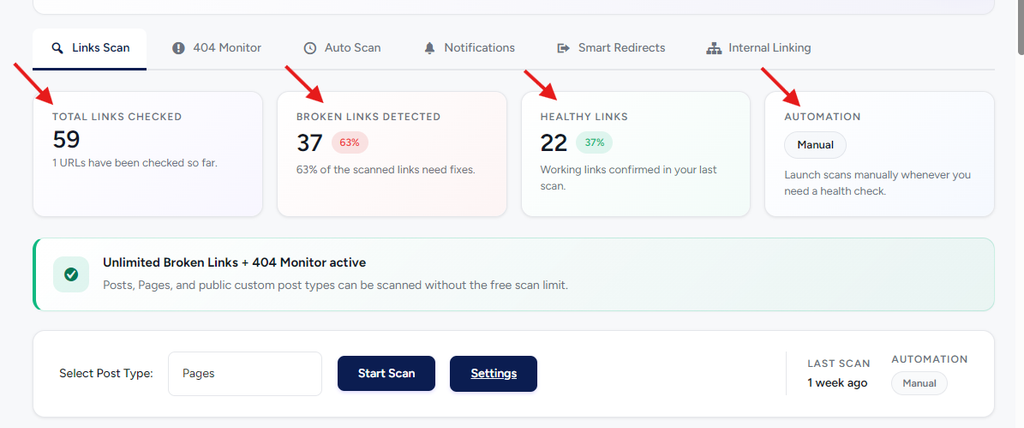
Total Links Checked
Shows the total number of links checked by SEO Repair Kit.
Broken Links Detected
Shows the number of links identified as broken during the scan.
Healthy Links
Shows the number of links that responded successfully.
Automation
Shows whether link scanning is currently being performed manually or through an automated schedule.
1.3 Monitor and Manage 404 Errors
SEO Repair Kit’s 404 Monitor automatically tracks requests to missing URLs on your website. It helps you identify frequently requested 404 pages, review request details, and redirect important missing URLs to relevant destinations.
In this guide, you’ll learn how to view 404 errors, filter and review records, create a redirect, and manage your 404 logs.
How to Monitor 404 Errors
1. Open the 404 Monitor
In your WordPress Dashboard, go to:
SEO Repair Kit → Links Manager → 404 Monitor
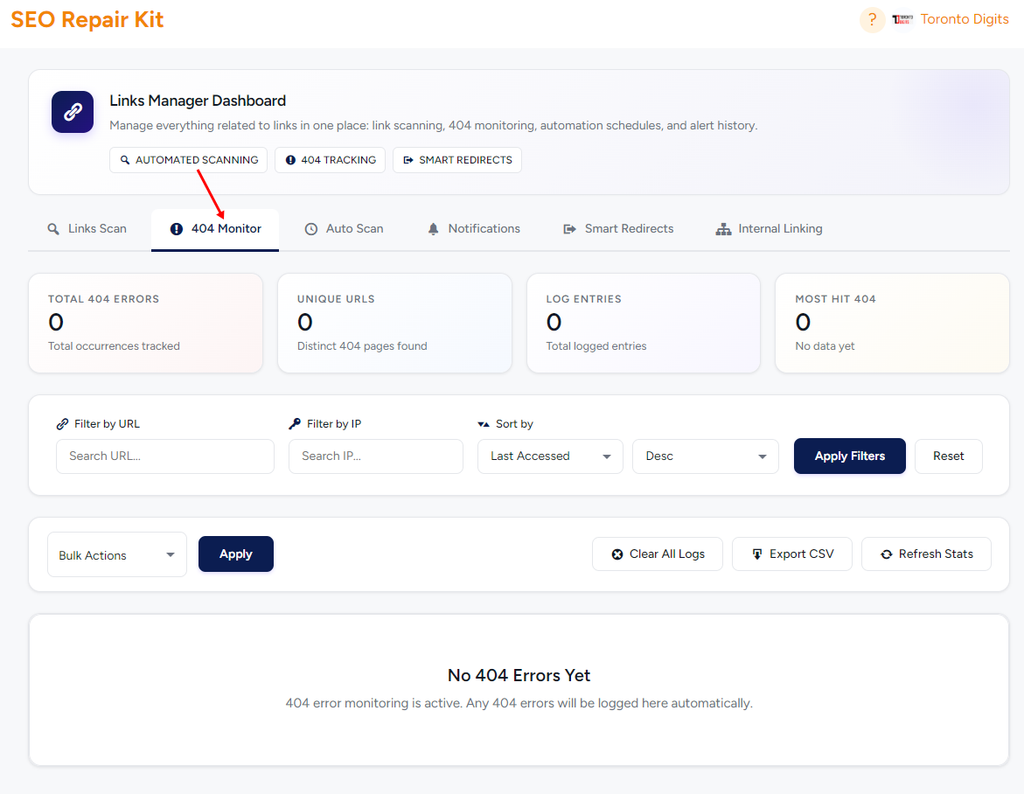
If no 404 errors have been recorded yet, you will see No 404 Errors Yet.
SEO Repair Kit automatically logs 404 errors when requests are made to missing URLs on your website. You do not need to start the 404 Monitor manually.
2. Review Your 404 Errors
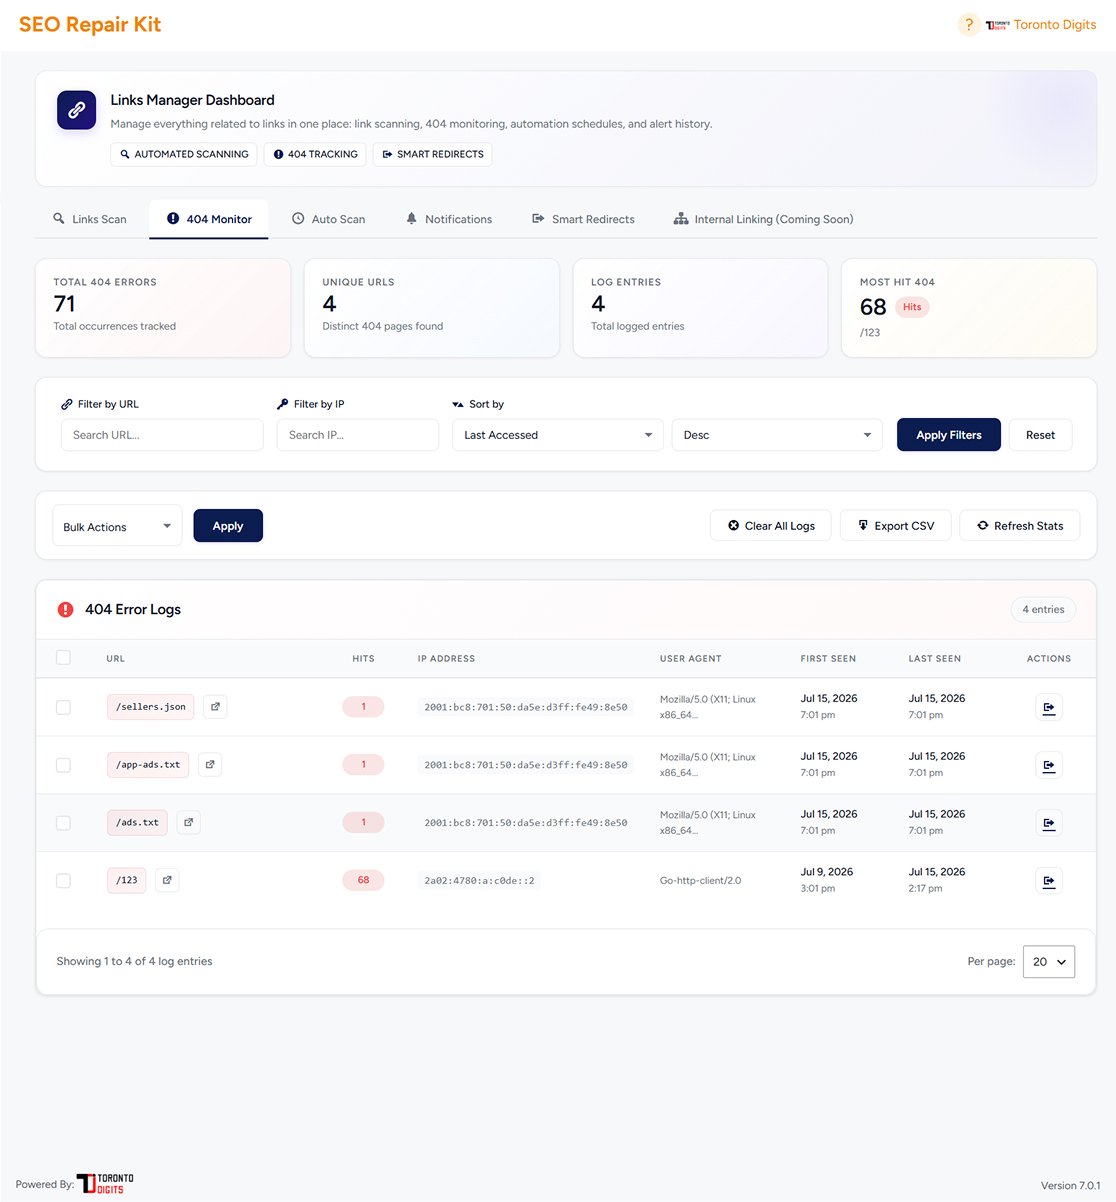
Once 404 errors are recorded, the dashboard displays your 404 statistics and error logs.
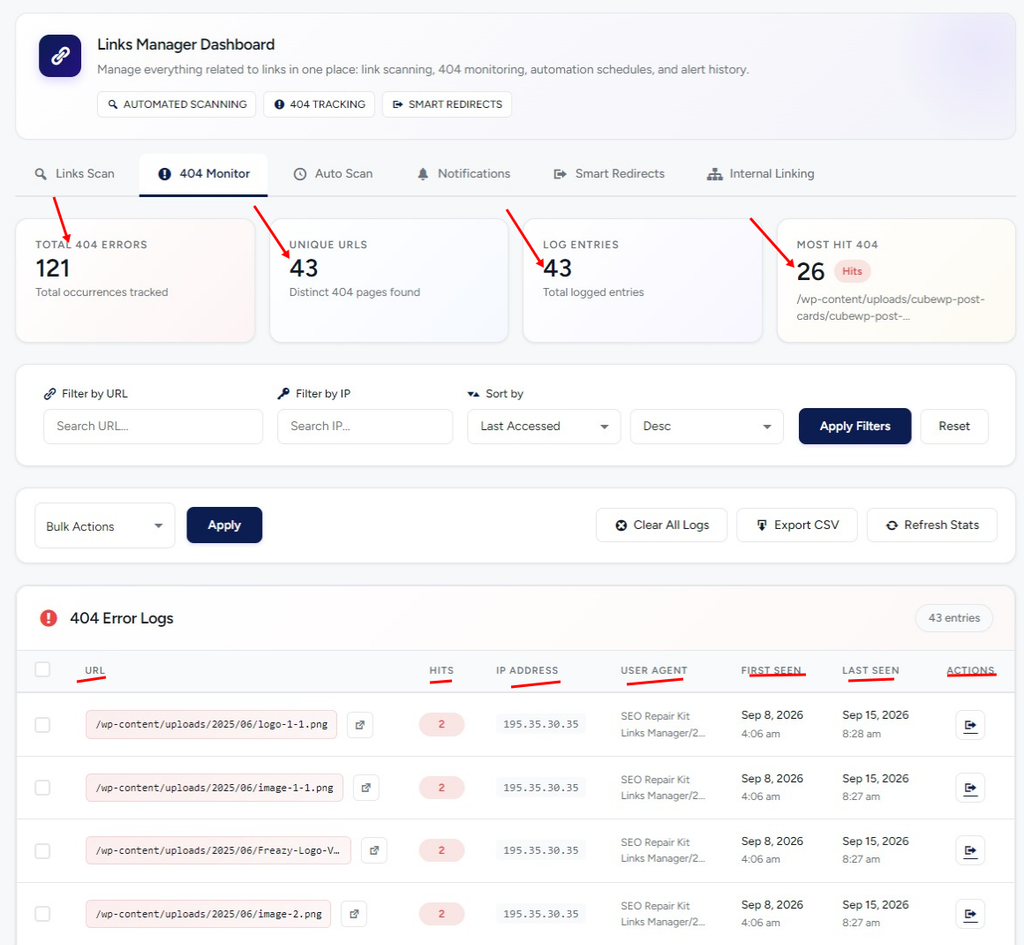
At the top, you can review:
Total 404 Errors — Total number of recorded 404 occurrences.
Unique URLs — Number of different URLs that generated 404 errors.
Log Entries — Number of recorded 404 log entries.
Most Hit 404 — The missing URL with the highest number of recorded requests.
Below the statistics, 404 Error Logs provides details about each error, including:
URL, Hits, IP Address, User Agent, First Seen, Last Seen, and Actions.
How to Search and Filter 404 Errors
Use the filtering options when you want to find specific 404 records.

You can:
- Use Filter by URL to search for a specific missing URL.
- Use Filter by IP to find requests associated with an IP address.
- Use Sort by and the order option to change how records are displayed.
- Click Apply Filters to apply your selections.
- Click Reset to clear the filters.
This lets you quickly narrow down the records you want to investigate.
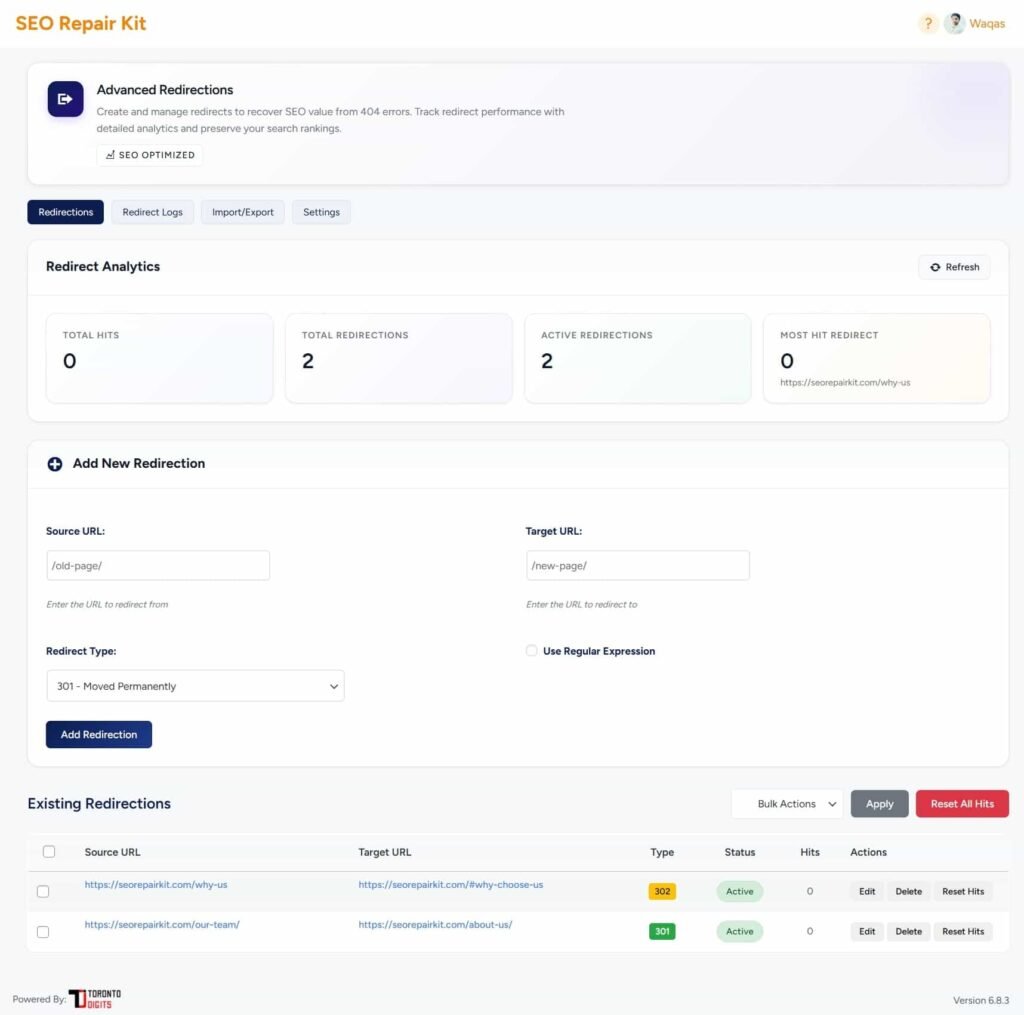
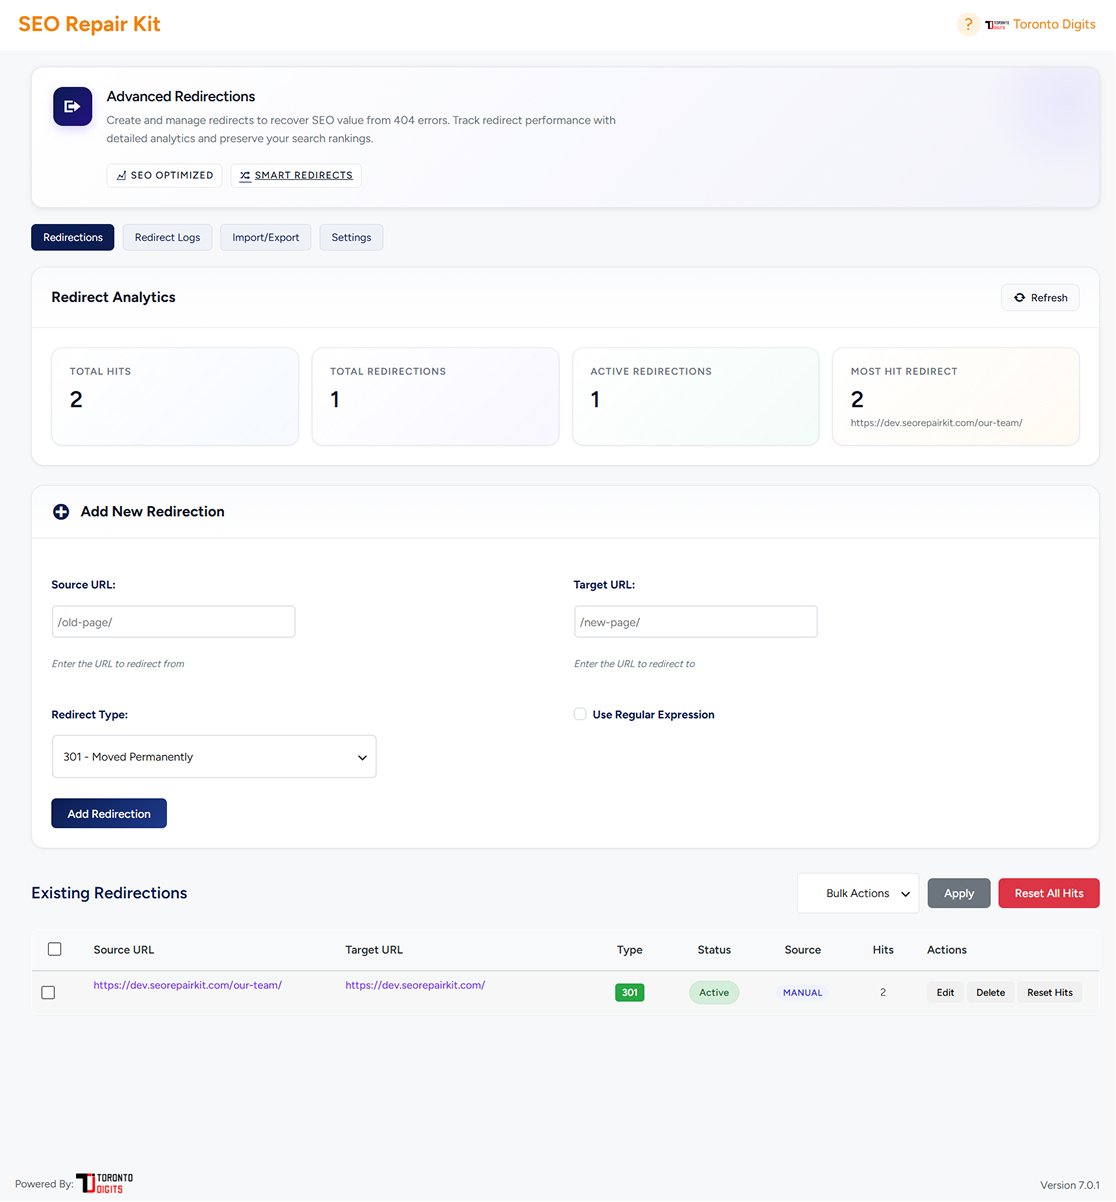
How to Create a Redirect From a 404 Error
Not every 404 needs a redirect. However, if a missing URL has moved or has a relevant replacement, you can create a redirect directly from its 404 record.
1. Find the 404 URL and Click the Action Button
In 404 Error Logs, locate the URL you want to redirect.
Click the button in the Actions column.
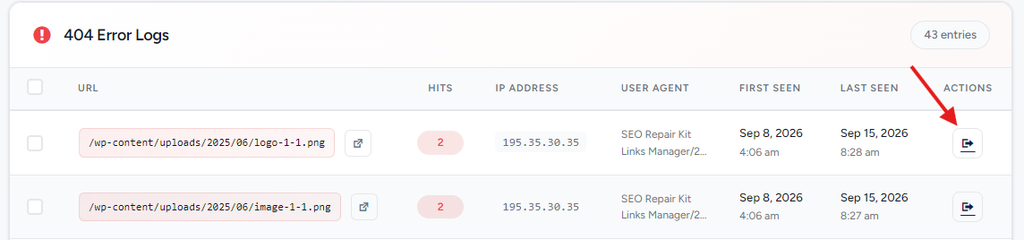
SEO Repair Kit will take you to the Redirection screen.
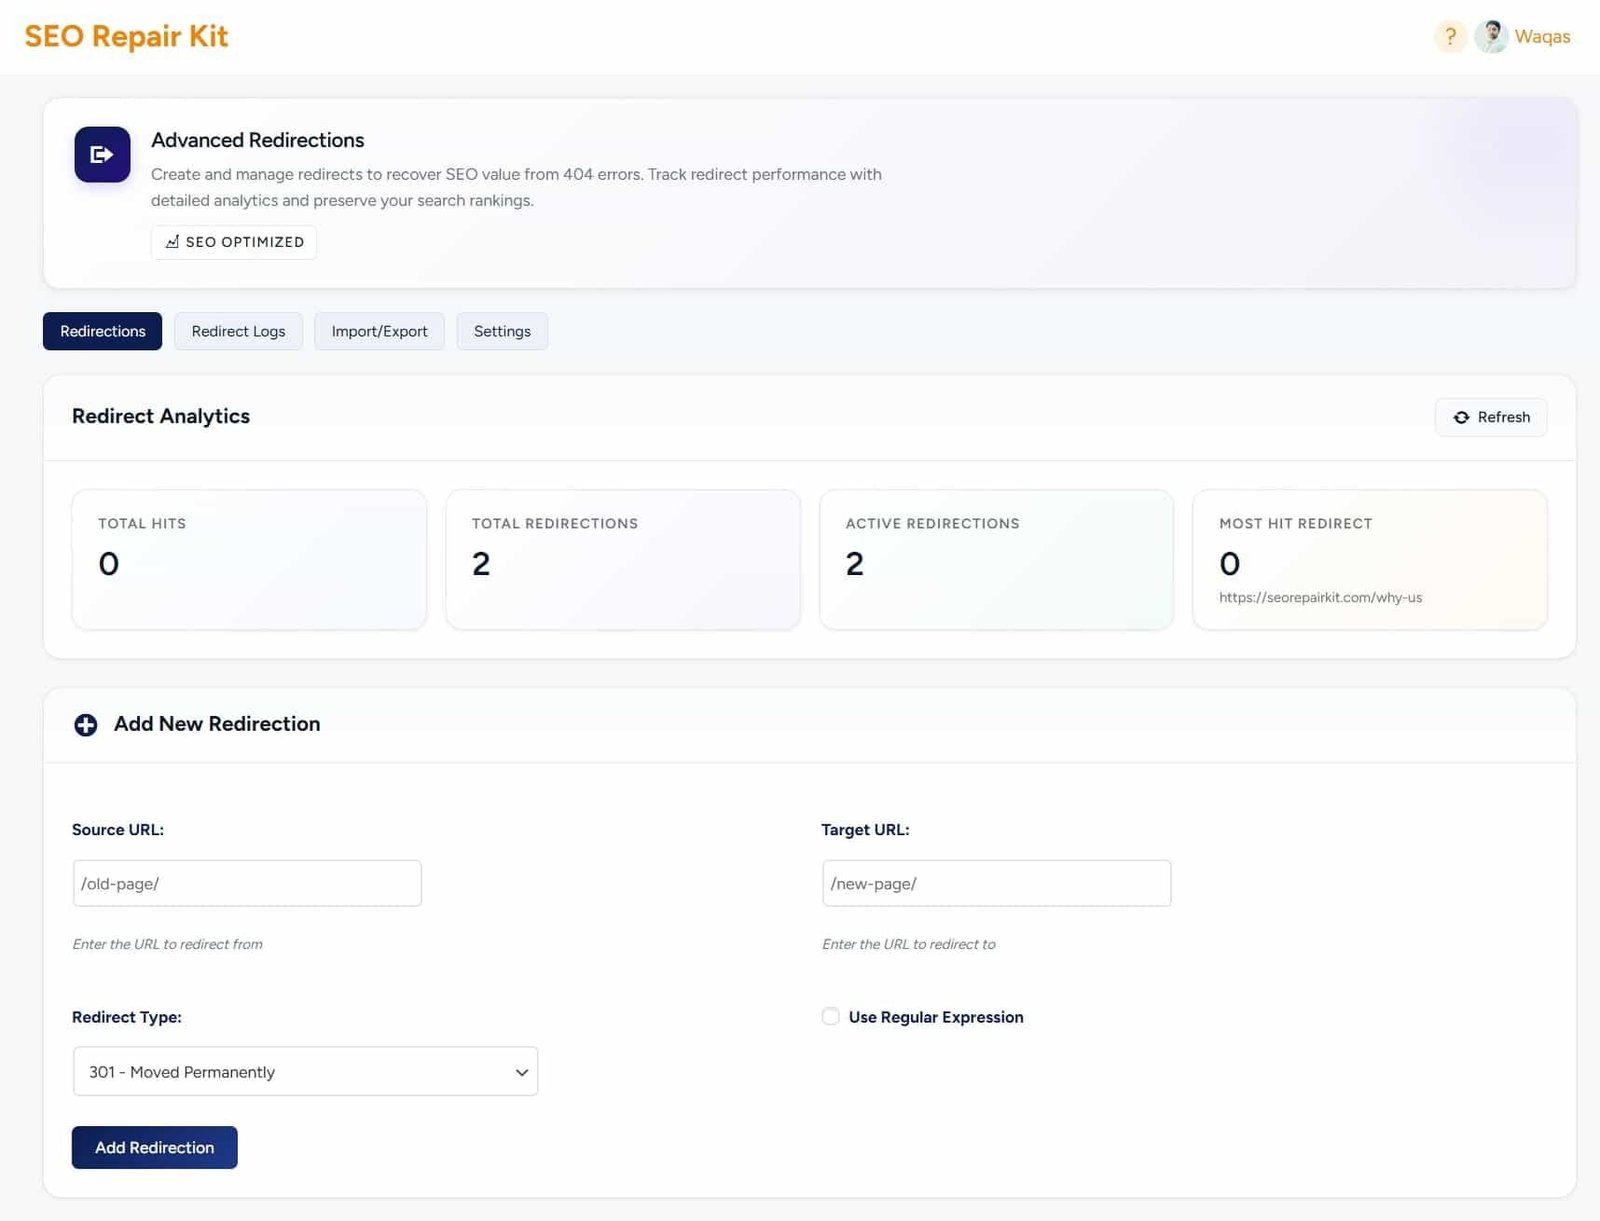
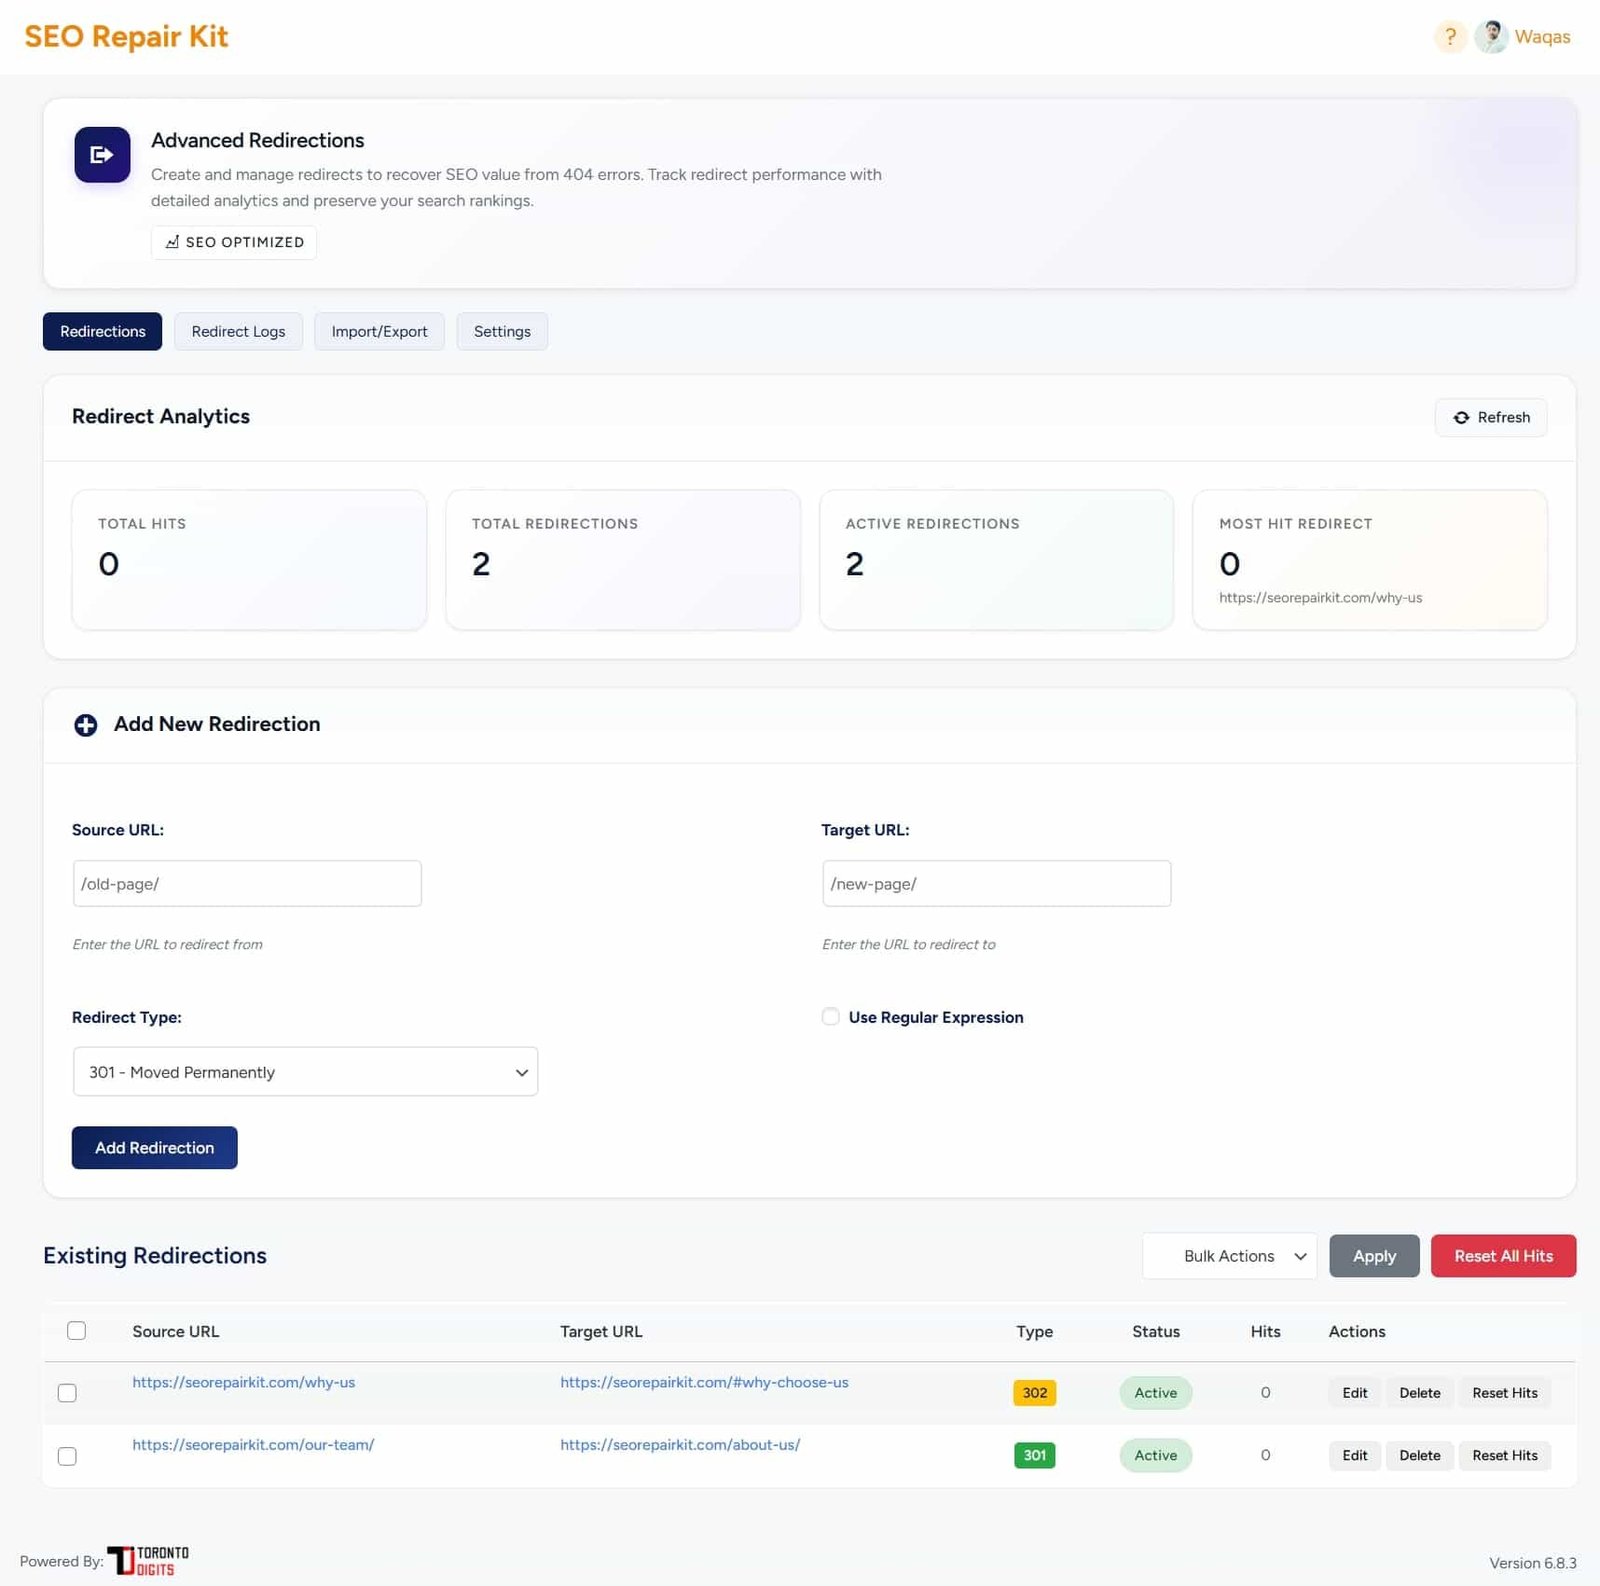
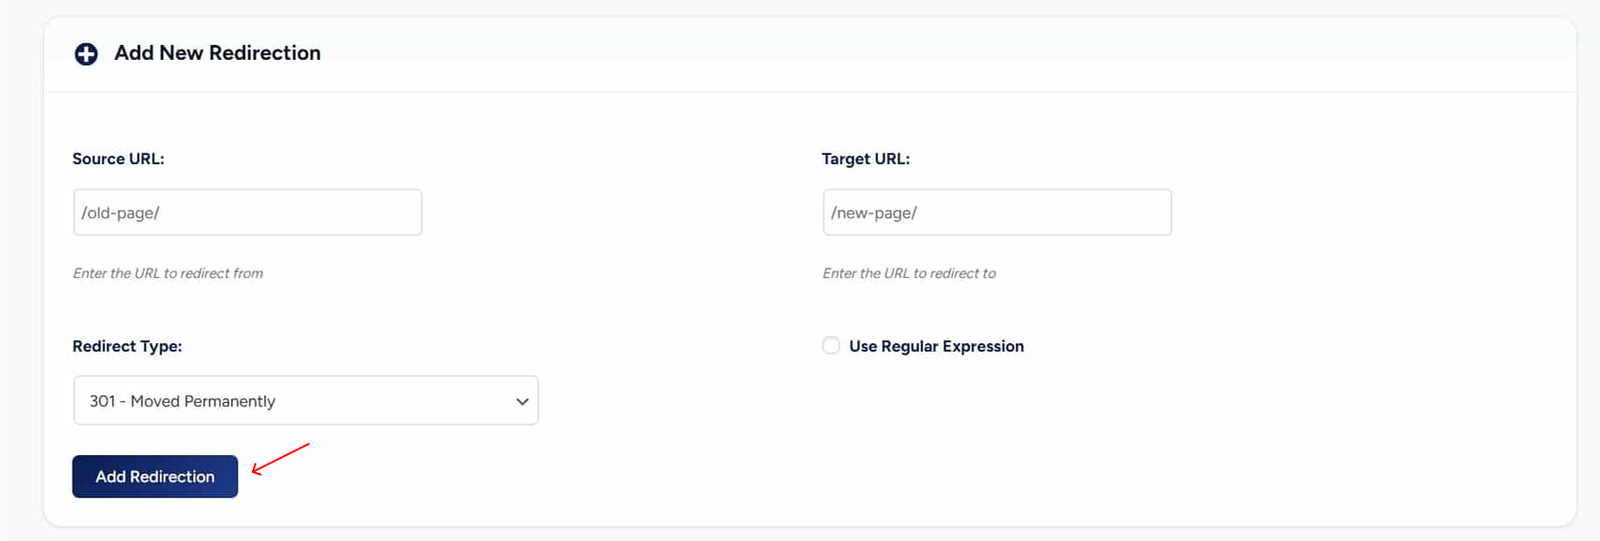
2. Configure the Redirection
The selected 404 URL is automatically added to the Source URL field.
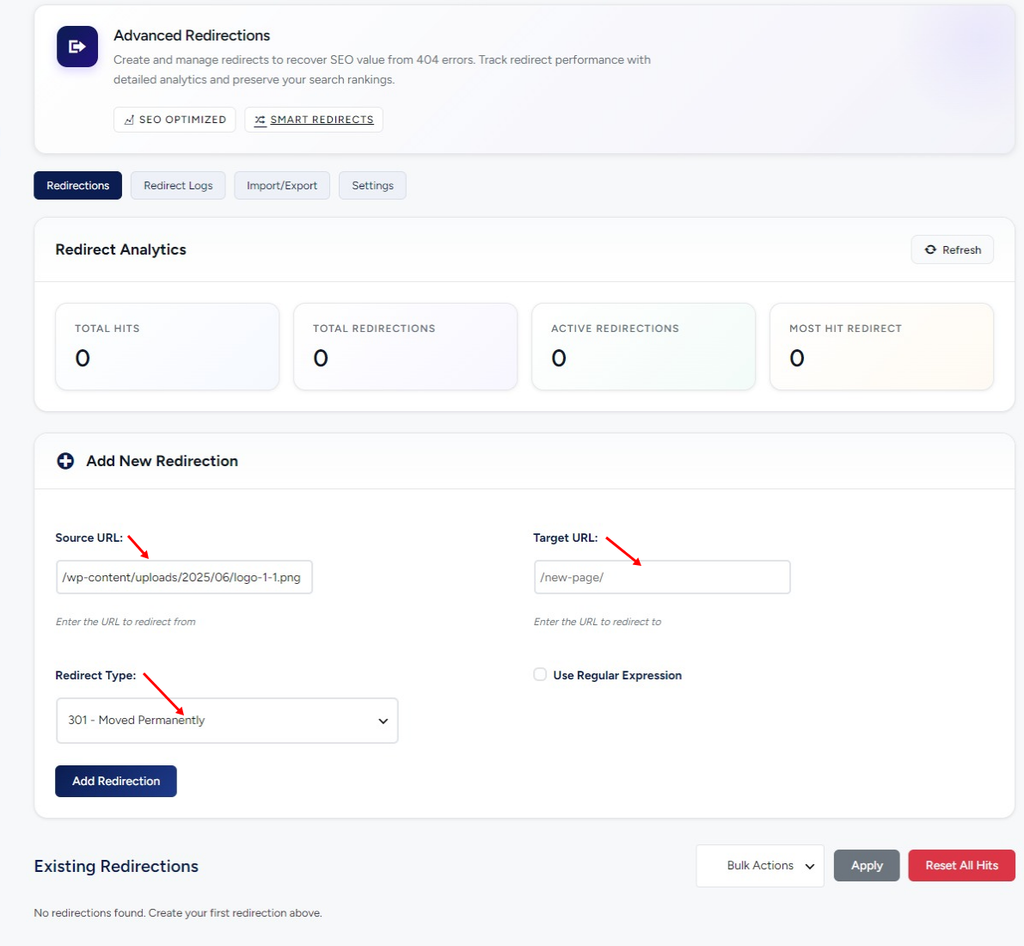
Complete the redirect settings:
Source URL — Automatically contains the missing URL selected from the 404 Monitor.
Target URL — Enter the relevant working URL where visitors should be sent.
Redirect Type — Choose the appropriate redirect type. Use 301 – Moved Permanently when the URL has permanently moved.
Use Regular Expression — Leave this disabled for a normal redirect unless you specifically need pattern-based matching.
After reviewing the information, click Add Redirection.
Important: Only redirect a 404 when there is a useful and relevant replacement. Avoid redirecting unrelated missing URLs to your homepage.
Manage Your 404 Records
The 404 Monitor also provides tools for managing and exporting your records.
Bulk Actions
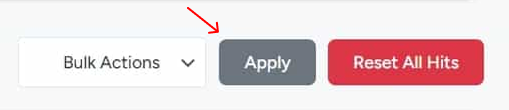
Select multiple records using their checkboxes, choose an available Bulk Action, and click Apply.
Export CSV
Click Export CSV to export the available 404 records for reporting or offline review.
Refresh Stats
Click Refresh Stats to reload the latest 404 statistics and records.
Clear All Logs
Click Clear All Logs when you intentionally want to remove the existing 404 monitoring history.
Important: Export any records you want to keep before clearing the logs.
Should Every 404 Error Be Redirected?
No. A 404 does not automatically require a redirect.
Create a redirect when an old page has permanently moved or when there is a clear and relevant replacement.
For example:
/old-services/ → /services/
If the URL was never valid or there is no useful replacement, it can remain a 404.
What’s the Difference Between Links Scan and 404 Monitor?
Links Scan checks links contained within your WordPress content and identifies links that may be broken.
404 Monitor records requests made to missing URLs on your own website.
Using both tools helps you identify different types of link issues.
1.4 Set Up Automatic Link Scanning
SEO Repair Kit’s Auto Scan lets you automatically check your website for broken links on a schedule. You can choose how often scans run, which links and content types are checked, and whether email alerts are sent when broken links are found.
In this guide, you’ll learn how to configure and run automatic link scanning.
How to Set Up Automatic Link Scanning
1. Open Auto Scan
In your WordPress Dashboard, go to:
SEO Repair Kit → Links Manager → Auto Scan
The Auto Scan Settings screen will open.
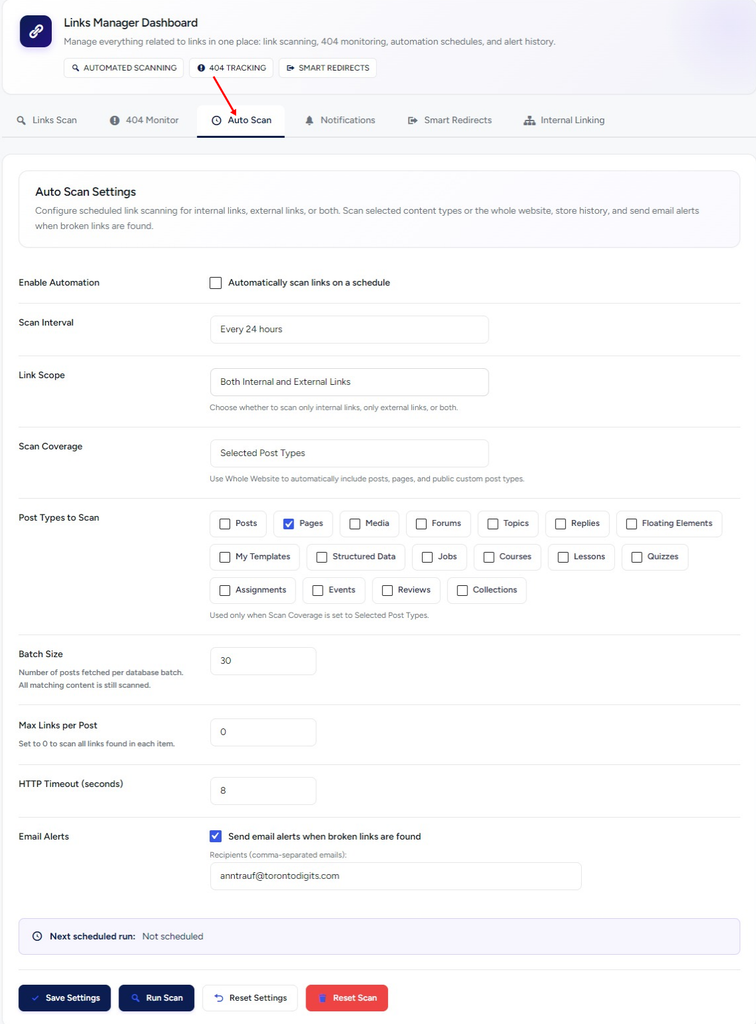
2. Enable Automatic Scanning
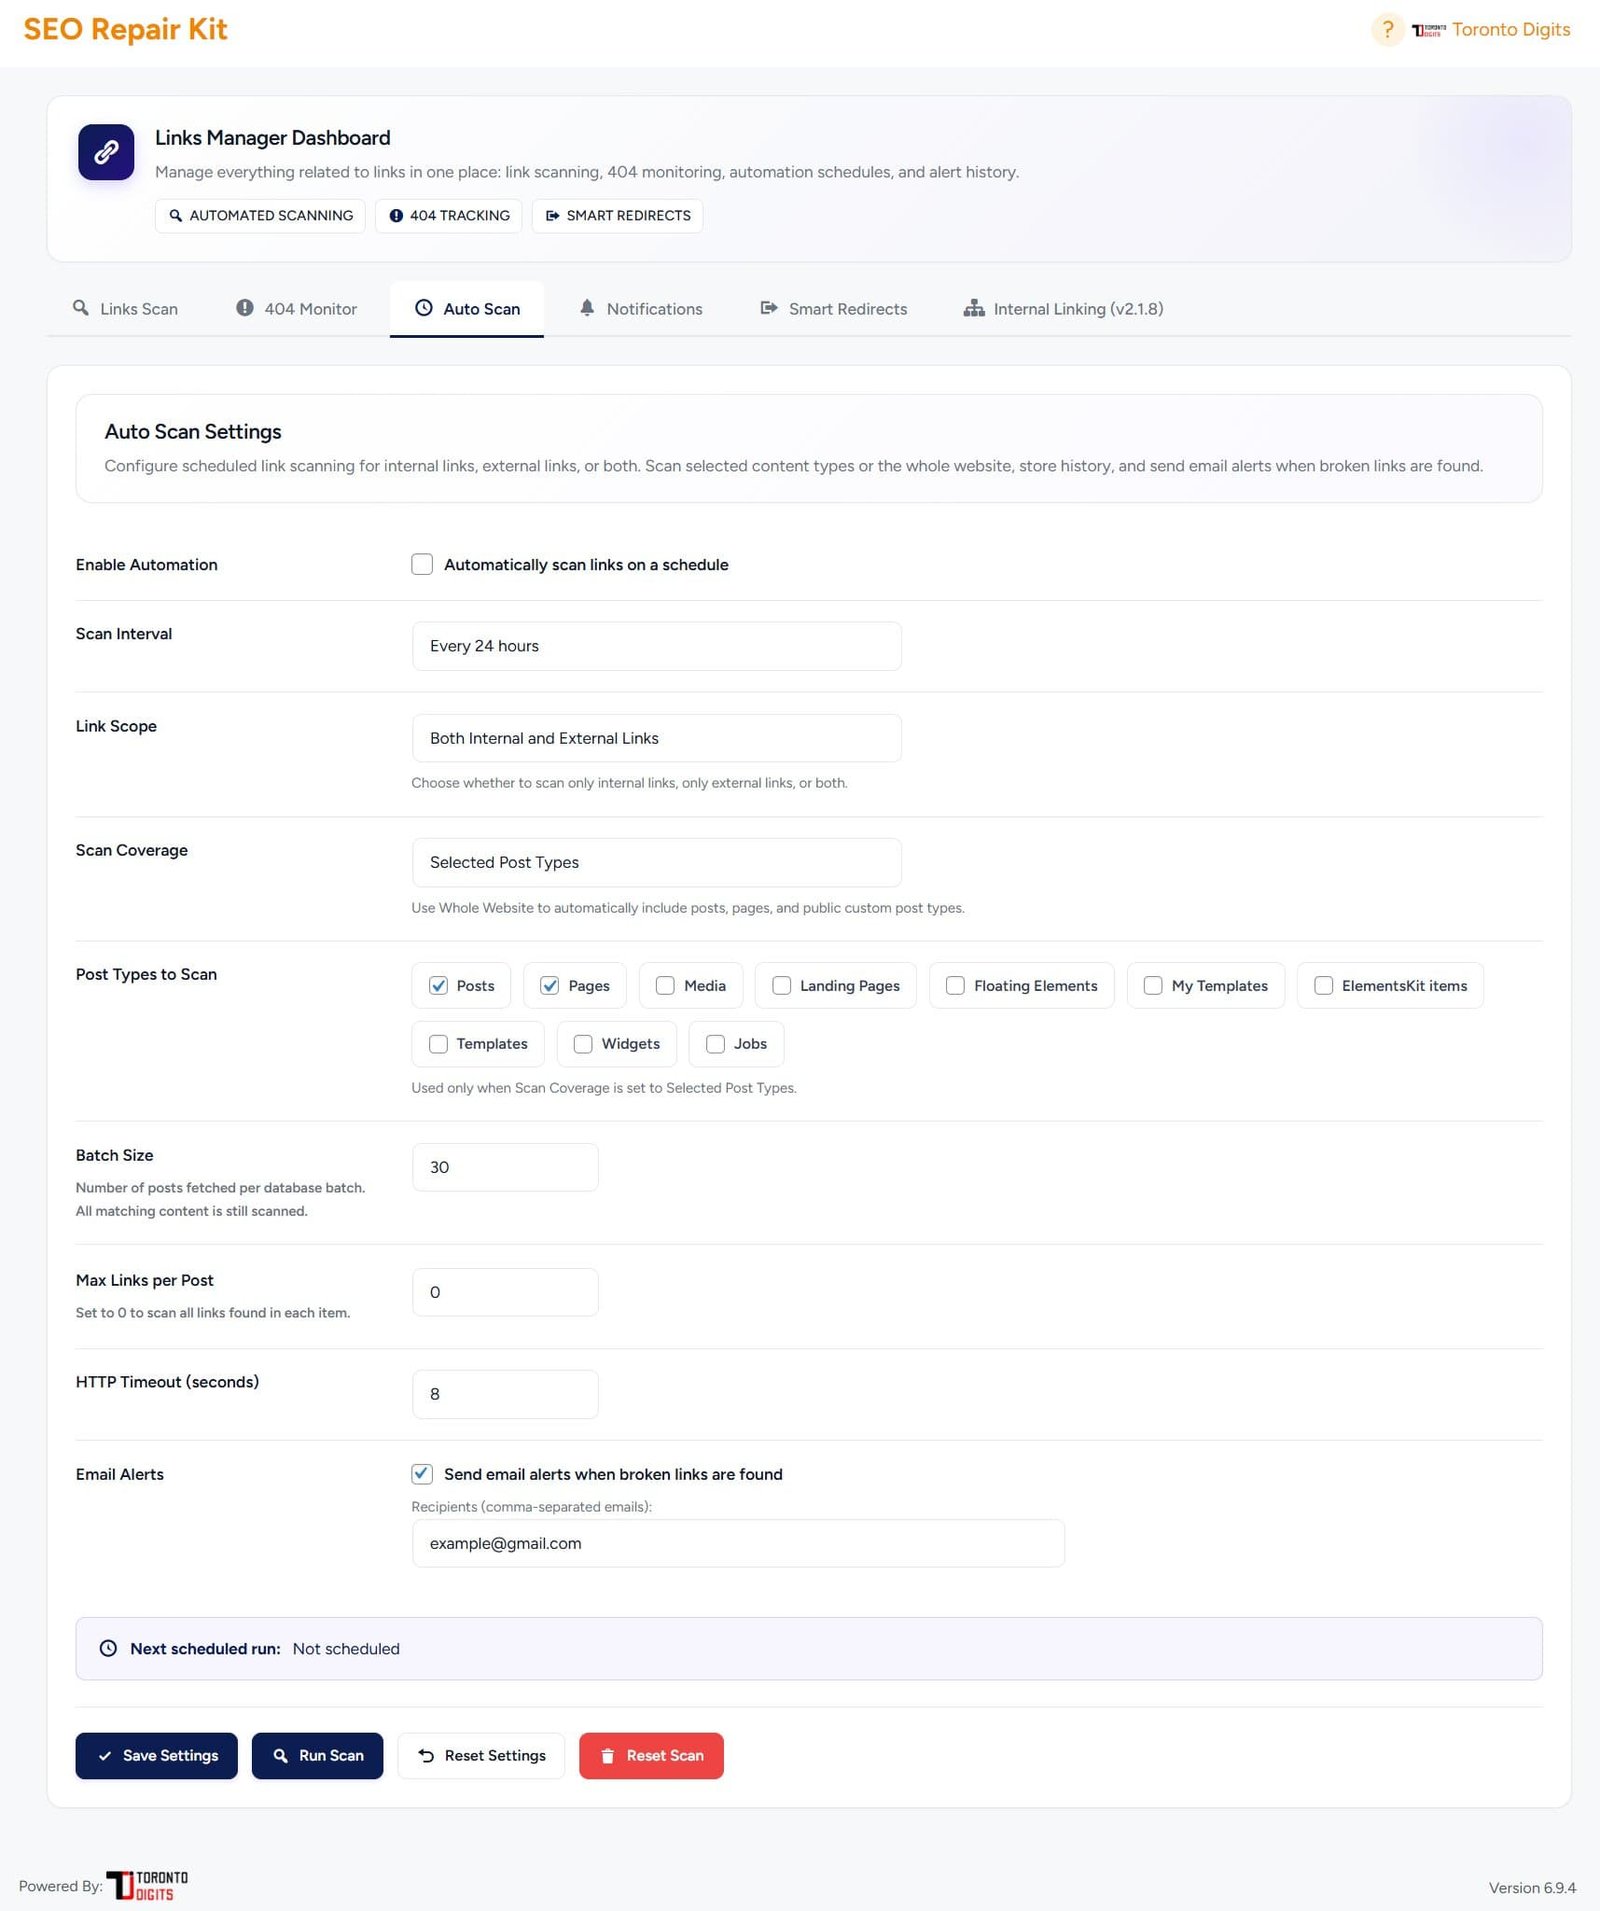
Under Enable Automation, select:
Automatically scan links on a schedule
Then use Scan Interval to choose how often SEO Repair Kit should automatically scan your links.
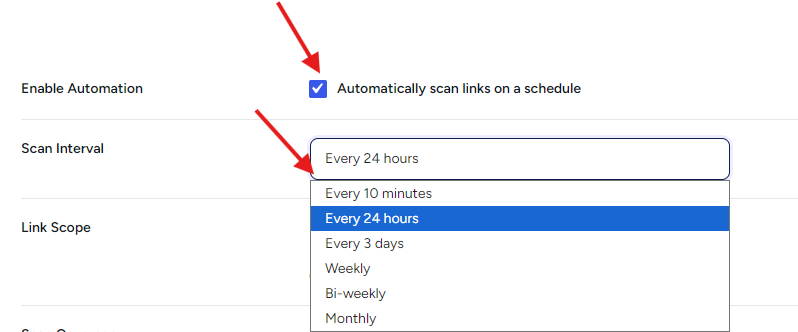
For example, select Every 24 hours if you want the scan to run once every 24 hours.
3. Choose Which Links and Content to Scan
Use Link Scope to choose which types of links should be checked.
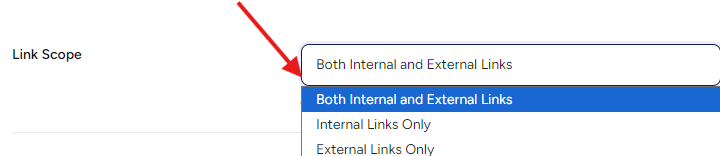
You can configure the scan for internal links, external links, or both.
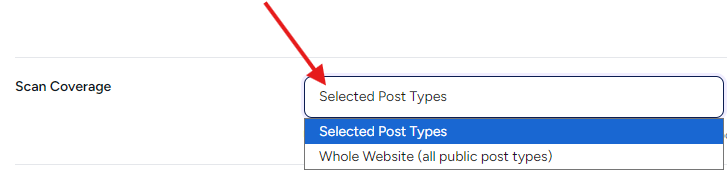
Then use Scan Coverage to choose how much of your website should be included.
Link Scope
Choose the link types you want SEO Repair Kit to check.
Select Both Internal and External Links if you want both types included.
Scan Coverage
Choose how SEO Repair Kit determines which content should be scanned.
Selected Post Types lets you manually choose specific content types.
Whole Website automatically includes applicable posts, pages, and public custom post types.
4. Select the Post Types to Scan
If Scan Coverage is set to Selected Post Types, choose the content types you want to include.

For example, you can select Posts, Pages, or any other relevant public post types available on your website.
The exact options depend on the content types registered on your WordPress installation.
Note: The Post Types to Scan options are used only when Scan Coverage is set to Selected Post Types.
Configure Scan Processing
The next three settings control how SEO Repair Kit processes links during automatic scans.
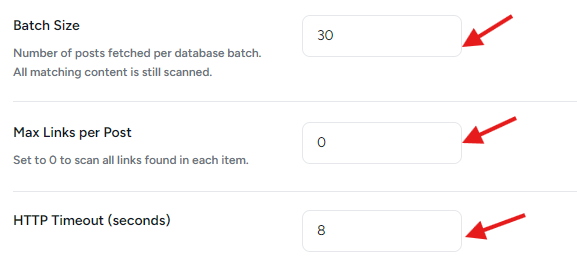
Batch Size
Batch Size controls how many posts are fetched in each database batch.
All matching content is still scanned.
If you are unsure, you can keep the existing/default value.
Max Links per Post
Controls how many links can be scanned in each content item.
Set this to 0 to scan all links found in each item.
HTTP Timeout (seconds)
Controls how long SEO Repair Kit waits for a link request before it times out.
If you are unsure, keep the existing/default value.
Enable Broken Link Email Alerts
If you want to receive an email when an automatic scan finds broken links, enable:
Send email alerts when broken links are found
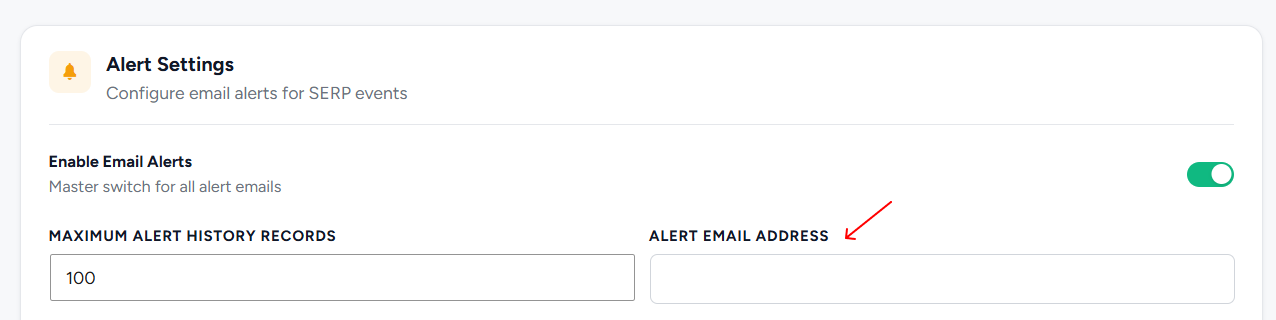
Then enter the email address that should receive the alerts.

For multiple recipients, enter the email addresses separated by commas, as indicated in the interface.
Save Your Auto Scan Settings
After configuring the scan, click Save Settings.
Once automation is enabled and the configuration is saved, check Next scheduled run to see when the next automatic scan is scheduled.
Run a Scan Immediately
You do not need to wait for the next scheduled scan if you want to check your links immediately.
Click Run Scan.
SEO Repair Kit will start a scan using your configured Auto Scan settings.
After the scan completes, you can review its activity from:
Links Manager → Notifications
Reset Auto Scan
The Auto Scan screen also provides two reset options.
Reset Settings
Click Reset Settings when you want to reset the Auto Scan configuration.
Reset Scan
Click Reset Scan when you need to reset the scan state.
Important: Use the reset options only when necessary. If you only want to change your automatic scan configuration, update the required fields and click Save Settings instead.
Recommended Auto Scan Setup
If you want to monitor both internal and external links across selected website content, you can configure Auto Scan like this:
Enable Automation: Enabled
Scan Interval: Every 24 hours
Link Scope: Both Internal and External Links
Scan Coverage: Selected Post Types
Post Types: Select the content types you want monitored
Max Links per Post: 0 to scan all links
Email Alerts: Enabled if you want broken-link notifications
For Batch Size and HTTP Timeout, keep your existing/default values unless you have a specific reason to change them.
What Happens After You Enable Auto Scan?
Once your settings are saved, SEO Repair Kit can run link scans according to the selected schedule.
When scans run, you can review information such as scanned content, total links, broken links, and email alert activity from the Notifications tab.
View Scan & Notification History →
What’s the Difference Between Links Scan and Auto Scan?
Links Scan is useful when you want to manually select content and run a link scan yourself.
Auto Scan lets SEO Repair Kit perform recurring scans based on your saved schedule and configuration.
You can use both together: run manual scans whenever needed and use Auto Scan for ongoing monitoring.
1.5 View Scan & Notification History
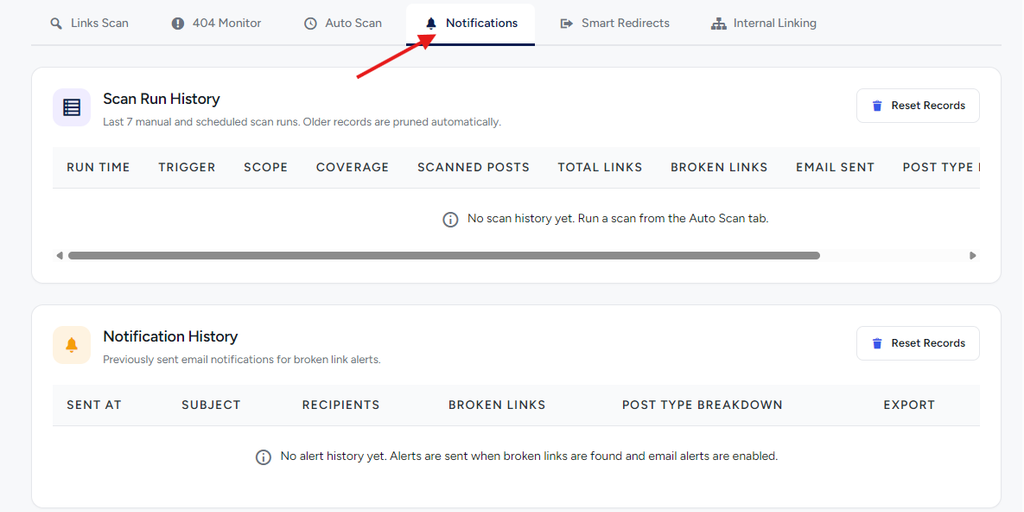
1. Open the Notifications Tab
In your WordPress Dashboard, go to:
SEO Repair Kit → Links Manager → Notifications
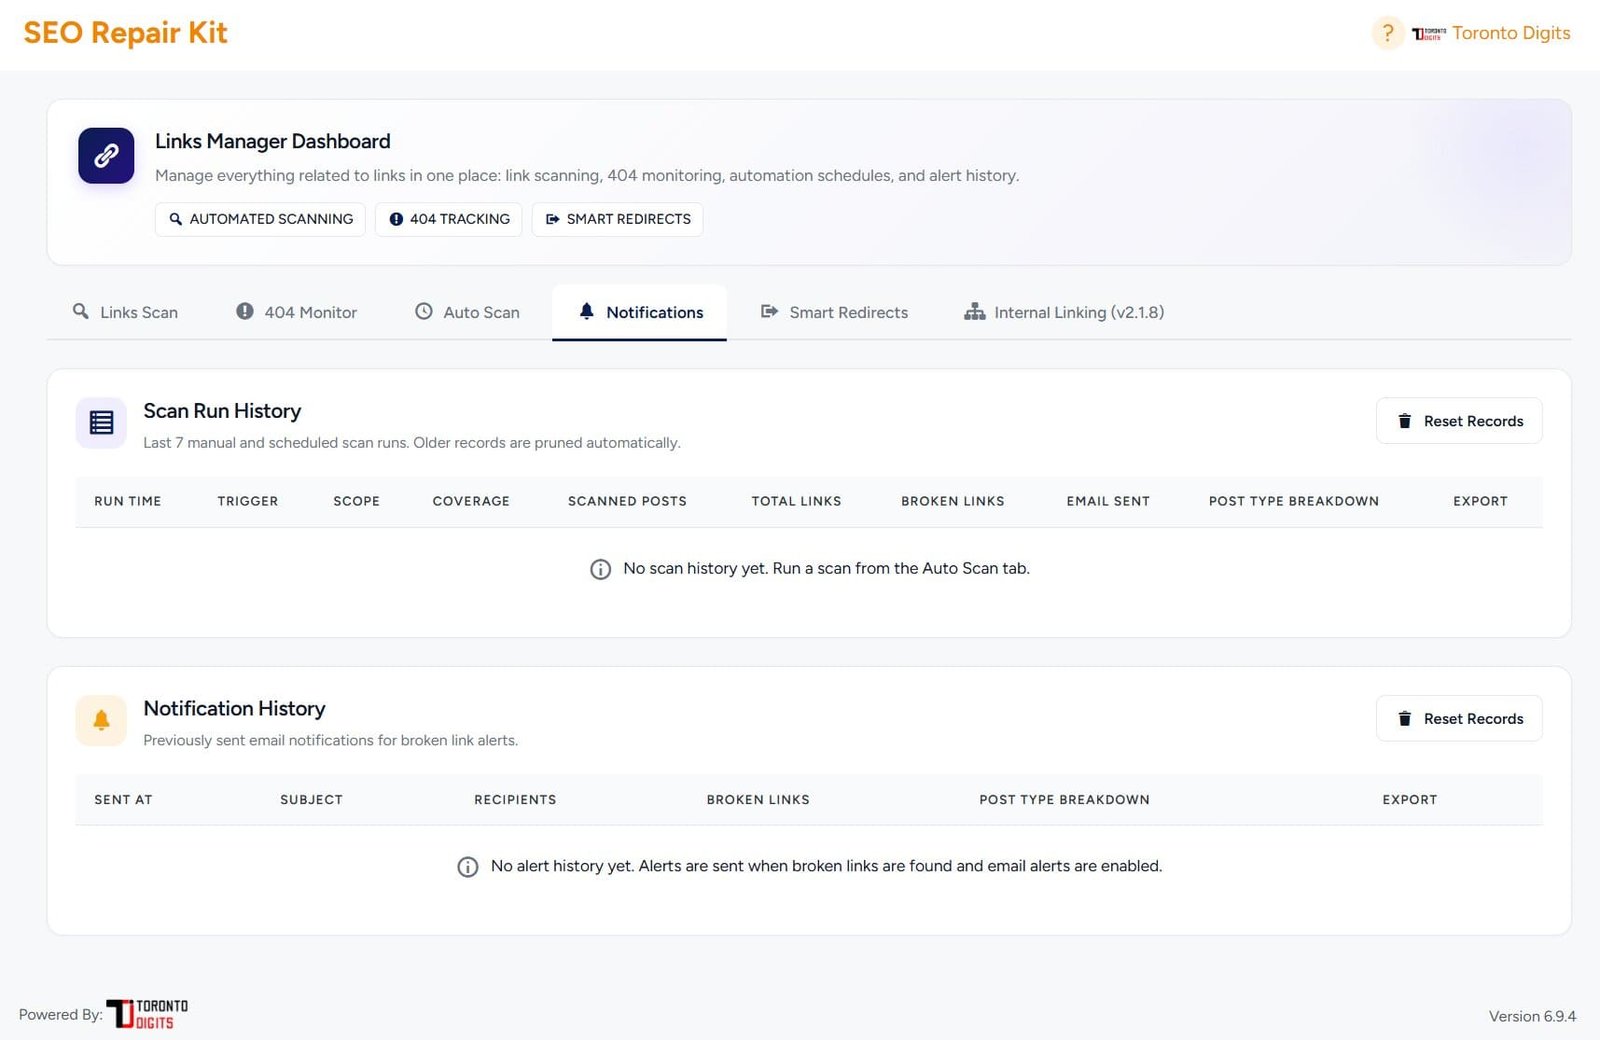
The Notifications screen contains two sections:
- Scan Run History
- Notification History
View Scan Run History
The Scan Run History section displays your recent manual and scheduled link scans.
SEO Repair Kit keeps the last 7 manual and scheduled scan runs. Older records are pruned automatically.
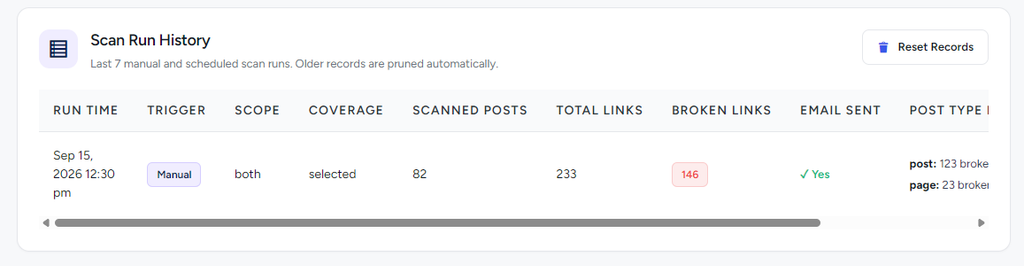
Each scan record can include:
Run Time — Shows when the scan was performed.
Trigger — Shows whether the scan was started manually or through the automatic scan schedule.
Scope — Shows which link scope was used for the scan.
Coverage — Shows which website content was included.
Scanned Posts — Shows the number of content items processed.
Total Links — Shows the total number of links checked.
Broken Links — Shows how many broken links were found.
Email Sent — Shows whether an email alert was sent for the scan.
Post Type Breakdown — Shows information about the post types included in the scan.
Note: If you see No scan history yet, run a scan from the Auto Scan tab. The scan history will appear here after applicable scan activity is recorded.
View Notification History
The Notification History section shows email notifications previously sent for broken-link alerts.
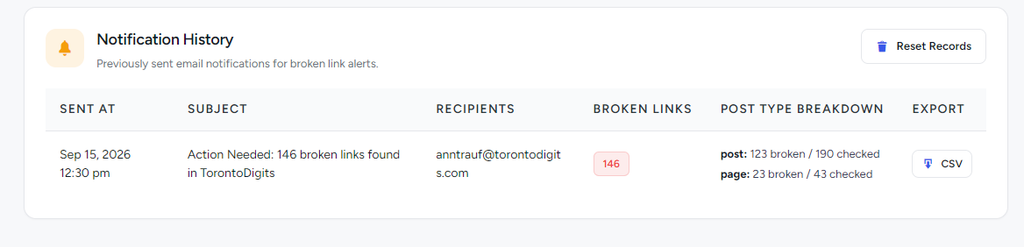
Each notification record can include:
Sent At — Shows when the email notification was sent.
Subject — Shows the subject of the notification email.
Recipients — Shows the email address or addresses that received the alert.
Broken Links — Shows the number of broken links associated with the notification.
Post Type Breakdown — Shows which content types were involved.
Export — Provides the available option for exporting notification information.
Why Is My Notification History Empty?
If you see:
No alert history yet
it means no applicable broken-link email alert has been recorded.
For alerts to be sent, make sure Email Alerts are enabled under:
SEO Repair Kit → Links Manager → Auto Scan
and that a valid recipient email address has been added.
Alerts are sent when broken links are found and email alerts are enabled.
Set Up Automatic Link Scanning →
Reset Scan or Notification History
Both history sections include a Reset Records button.
[IMAGE 4: Reset Records buttons highlighted in both sections]
To clear a history section, click its corresponding Reset Records button.
Use the button in Scan Run History to reset scan records, or the button in Notification History to reset notification records.
Important: Reset only the history you no longer need. The two Reset Records buttons apply to their respective sections.
What’s the Difference Between Scan Run History and Notification History?
Scan Run History records link scan activity, including manual and scheduled scans.
Notification History records email alerts that were sent when broken links were found.
This means a scan can appear in Scan Run History without necessarily creating a record in Notification History, such as when no broken-link email alert is sent.
1.6 Set Up Smart Redirects
How to Set Up Smart Redirects for Broken Internal Links
Smart Redirects helps prevent eligible broken internal singular URLs from leaving visitors on a 404 page. When enabled for a supported post type, SEO Repair Kit can create a 301 redirect from the broken URL to that post type’s archive page.
In this guide
- How Smart Redirects work
- Enabling Smart Redirect automation
- Choosing post types
- Saving settings
- Reviewing Smart Redirect records
- Filtering records
- Managing generated redirects
- Resetting Smart Redirect records
- Opening the Redirection Manager
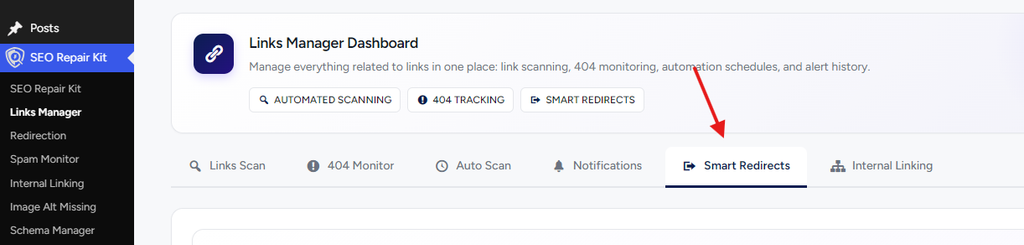
Open Smart Redirects
Go to:
SEO Repair Kit → Links Manager → Smart Redirects
How Smart Redirects Work
Smart Redirects are designed for eligible broken internal singular pages.
For example:
/case-studies/broken-slug/ → /case-studies/
/blog/deleted-post/ → /blog/
/products/old-item/ → /products/
Instead of sending the visitor to a missing page, the generated 301 redirect sends them to the relevant post-type archive.
Smart Redirects only apply where the feature can determine an appropriate archive destination.
Enable Smart Redirect Automation
Select:
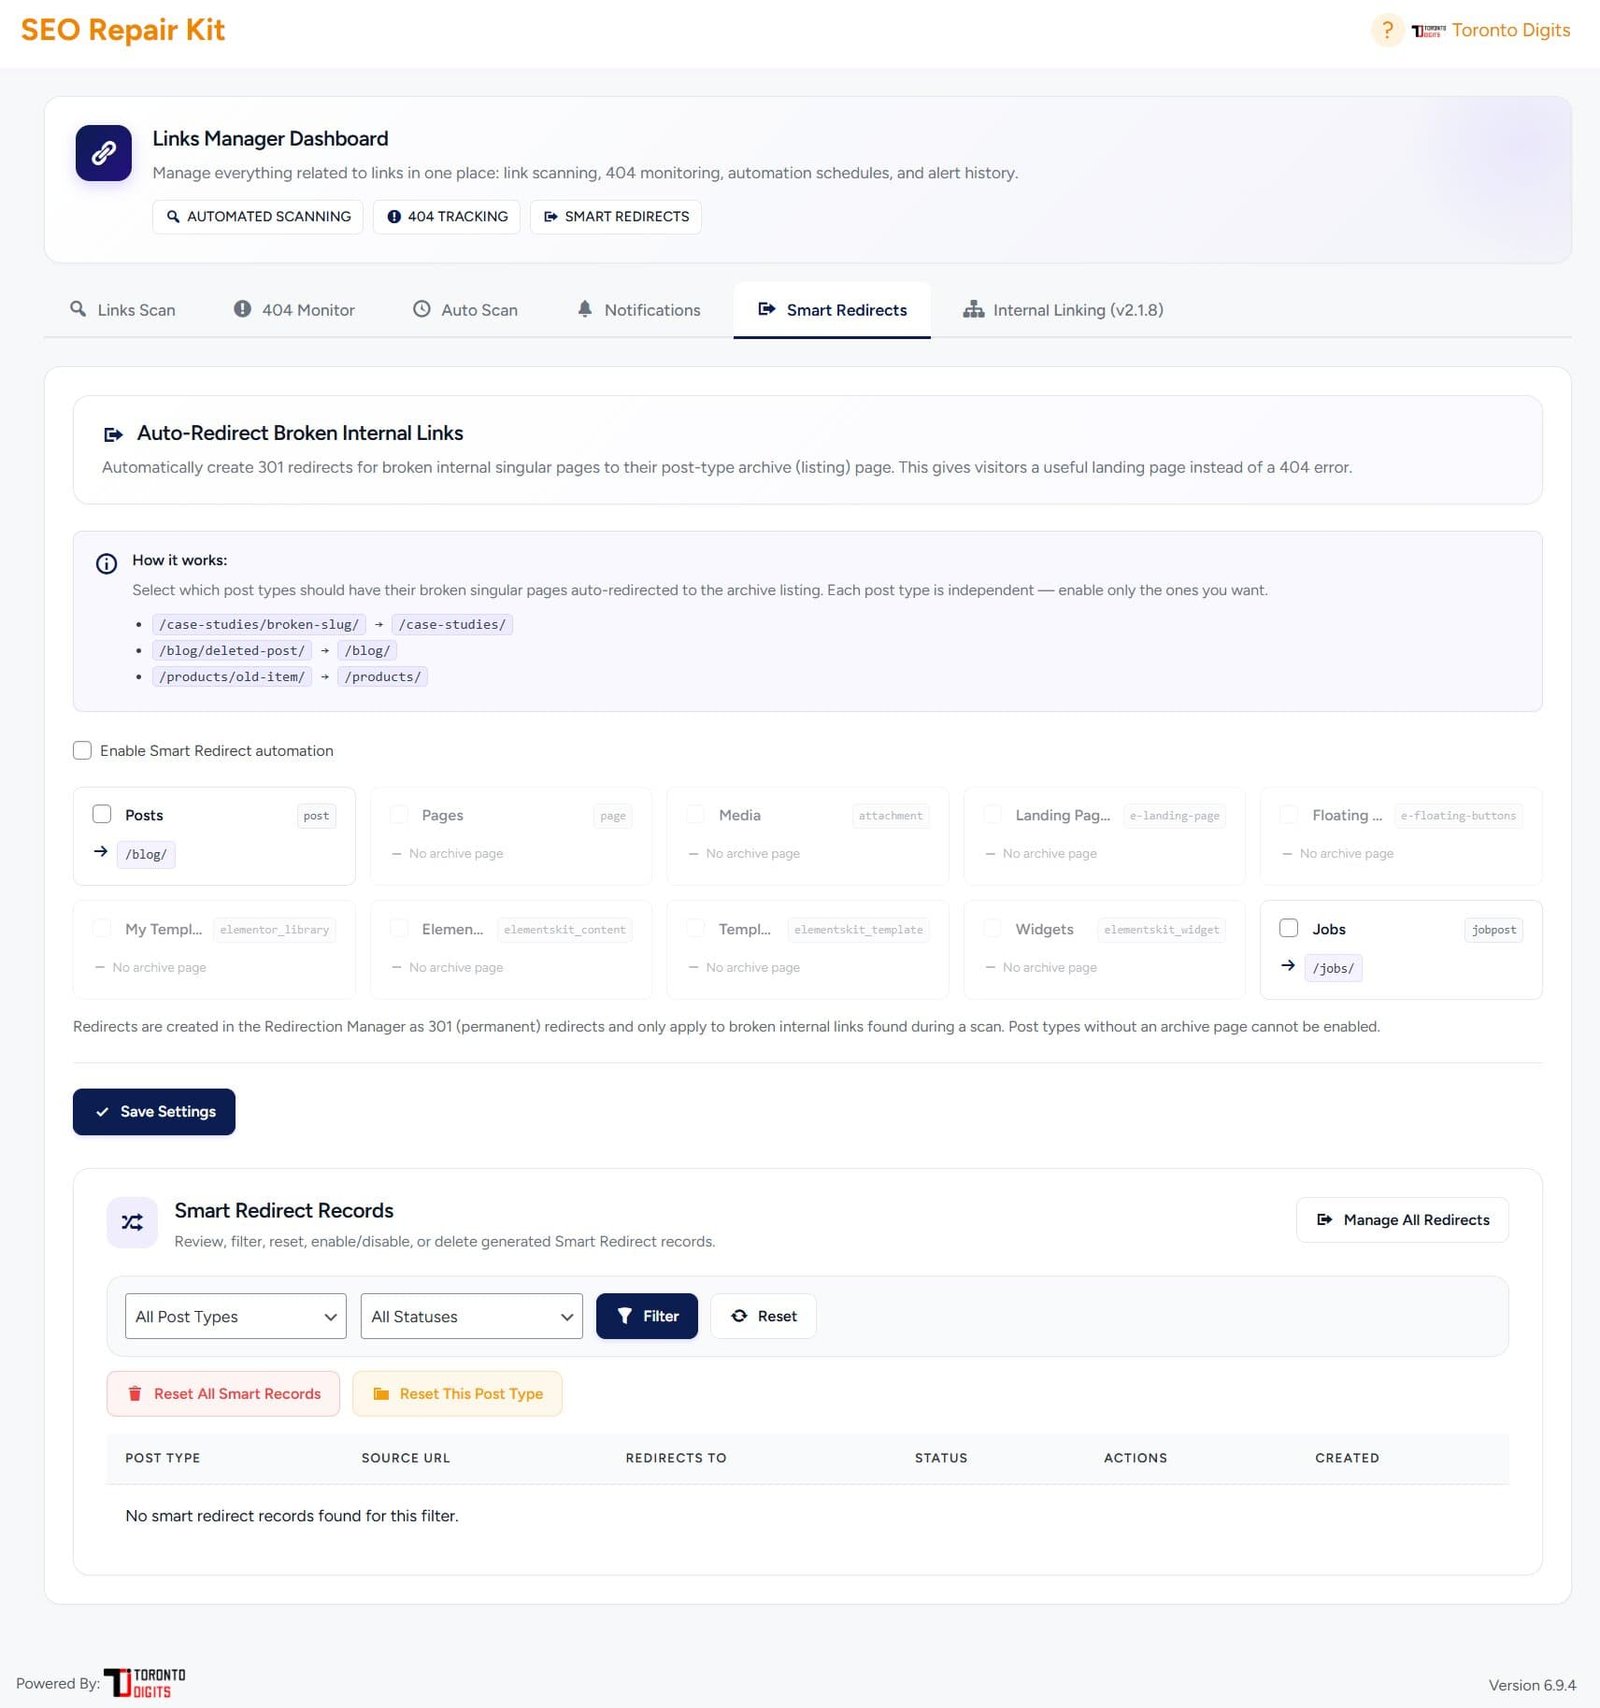
Enable Smart Redirect automation
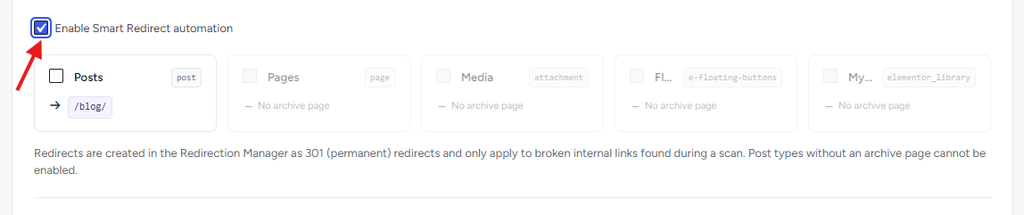
Then choose the post types for which you want this behavior enabled.
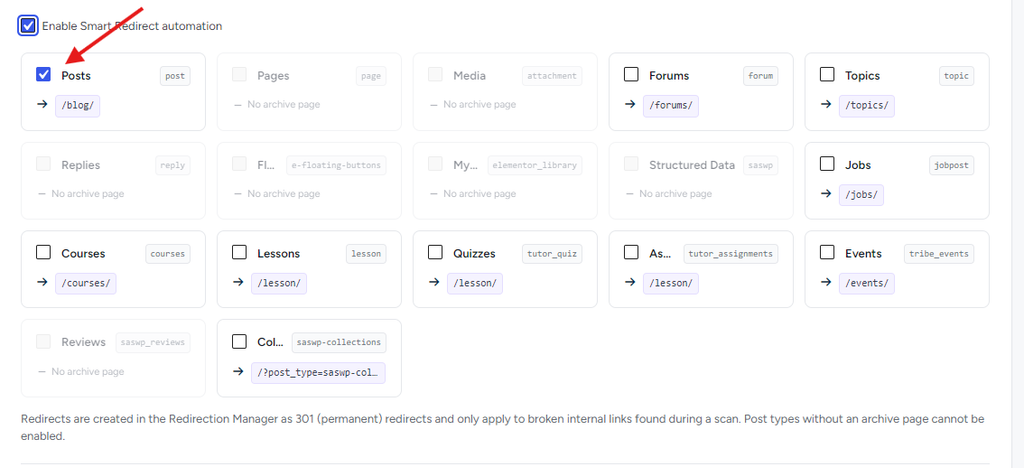
Choose Post Types
Each available post type is displayed separately.
Where an archive is available, the interface shows the destination that can be used.
Some post types may display:
No archive page
These cannot be enabled for this Smart Redirect behavior because there is no applicable archive destination.
Enable only the post types for which automatic archive redirects make sense.
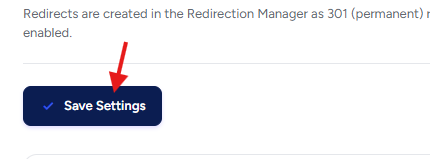
Save Smart Redirect Settings
After choosing the required post types, click:
Save Settings
SEO Repair Kit will use the saved configuration when processing eligible broken internal links.
Smart Redirect Records
Generated Smart Redirects appear under Smart Redirect Records.
This area lets you review and manage records created by the feature.
Available information includes:
- Post Type
- Source URL
- Redirects To
- Status
- Actions
- Created
Filter Smart Redirect Records
Use the filters to narrow the list by:
- Post type
- Status
Click Filter to apply your selection.
Click Reset to clear the filters.
Manage Smart Redirect Records
Depending on the available action for a record, you can review or manage its status from the records table.
Generated redirects are created as 301 (permanent) redirects and can also be managed through SEO Repair Kit’s Redirection Manager.
Manage All Redirects
Click Manage All Redirects to open the main Redirection Manager.
Use the Redirection Manager when you need broader control over redirects beyond Smart Redirect automation.
Reset Smart Redirect Records
The interface provides reset options including:
Reset All Smart Records
and
Reset This Post Type
Use these actions carefully because they affect stored Smart Redirect records
1.7 Links Manager FAQs
What is SEO Repair Kit’s Links Manager?
Links Manager brings SEO Repair Kit’s link monitoring and management tools together in one place.
From the Links Manager Dashboard, you can access:
- Links Scan
- 404 Monitor
- Auto Scan
- Notifications
- Smart Redirects
- Internal Linking
Each area handles a different part of your website’s link management.
Where can I find Links Manager?
In your WordPress Dashboard, go to:
SEO Repair Kit → Links Manager
The Links Manager Dashboard will open with all available link management tabs.
Which Links Manager tool should I use first?
If you are using Links Manager for the first time, start with Links Scan.
It gives you an initial view of broken and healthy links found in your selected WordPress content.
Scan Your Website for Broken Links →
Links Scan FAQs
What does Links Scan do?
Links Scan checks links found in your selected WordPress content and helps identify links that are healthy or broken.
You can select the content type you want to check and start a manual scan.
How do I run a link scan?
Go to:
SEO Repair Kit → Links Manager → Links Scan
Select the post type you want to check and click Start Scan.
Scan Your Website for Broken Links →
Can I choose which post types are available for scanning?
Yes.
From Links Scan, open Settings and select the post types you want SEO Repair Kit to scan.
After making your selections, click Save Post Types.
The available post types depend on the content registered on your WordPress website.
Can Links Scan check custom post types?
Yes. Applicable public custom post types registered on your WordPress website can appear in the Post Types settings.
The exact options depend on your WordPress configuration, theme, and installed plugins.
What does Broken Links Detected mean?
Broken Links Detected shows the number and percentage of scanned links that SEO Repair Kit identified as broken and that may require review.
What should I do when Links Scan finds a broken link?
Review the URL and determine why it is broken.
Depending on the issue, you may need to correct the URL, replace the link, remove it, or create an appropriate redirect.
After making the change, run the scan again to verify the result.
Can I export my broken link scan results?
Yes. When scan results are available, use Download CSV to export the link scan information for offline review or reporting.
404 Monitor FAQs
What does the 404 Monitor do?
404 Monitor automatically records requests made to missing URLs on your website that return a 404 response.
It helps you identify which missing URLs are being requested and how frequently they are accessed.
Monitor and Manage 404 Errors →
Do I need to start the 404 Monitor manually?
No.
When 404 monitoring is active, applicable 404 requests are logged automatically.
If no records have been detected yet, the 404 Monitor displays No 404 Errors Yet.
What does “Most Hit 404” mean?
Most Hit 404 shows the missing URL with the highest number of recorded requests.
This can help you identify frequently requested missing URLs that may need attention.
What is the difference between Total 404 Errors and Unique URLs?
Total 404 Errors represents the total number of recorded 404 occurrences.
Unique URLs represents the number of different missing URLs that generated those errors.
For example, the same missing URL can be requested multiple times, increasing the total number of errors without increasing the number of unique URLs.
Can I search for a specific 404 URL?
Yes.
Use Filter by URL in the 404 Monitor and click Apply Filters.
You can also filter by IP address and sort your records.
Does every 404 error need a redirect?
No.
Create a redirect when the missing URL has a clear and relevant replacement.
If the URL was never valid or there is no appropriate replacement, it may be correct for it to remain a 404.
How do I redirect a URL from the 404 Monitor?
Find the URL in 404 Error Logs and click its button under Actions.
SEO Repair Kit will take you to the Redirection screen with the selected 404 URL automatically added as the Source URL.
Enter the relevant Target URL, choose the appropriate redirect type, and click Add Redirection.
Can I export my 404 records?
Yes.
Click Export CSV from the 404 Monitor to export the available 404 data.
Can I clear my 404 logs?
Yes.
Click Clear All Logs to remove the existing 404 monitoring history.
Important: Export any records you want to keep before clearing the logs.
Auto Scan FAQs
What is Auto Scan?
Auto Scan lets SEO Repair Kit automatically check website links according to a schedule.
You can configure the scan interval, link scope, scan coverage, post types, processing options, and email alerts.
Set Up Automatic Link Scanning →
How do I enable automatic link scanning?
Go to:
SEO Repair Kit → Links Manager → Auto Scan
Enable Automatically scan links on a schedule, configure the required settings, and click Save Settings.
Can Auto Scan check both internal and external links?
Yes.
Use Link Scope to choose the available option for internal links, external links, or both.
Choose Both Internal and External Links when you want both types checked.
Can I choose which content Auto Scan checks?
Yes.
Under Scan Coverage, select Selected Post Types and choose the post types you want included.
You can also use Whole Website to automatically include applicable posts, pages, and public custom post types.
What does Batch Size mean?
Batch Size controls how many posts are fetched per database batch during scanning.
All matching content is still scanned.
If you do not have a specific reason to change this setting, you can keep the existing/default value.
What does Max Links per Post mean?
This setting controls how many links can be checked in each content item.
Setting Max Links per Post to 0 tells SEO Repair Kit to scan all links found in each item.
What does HTTP Timeout mean?
HTTP Timeout (seconds) controls how long SEO Repair Kit waits for a link request before it times out.
Can I receive email alerts when broken links are found?
Yes.
Enable:
Send email alerts when broken links are found
Then enter the recipient email address. Multiple recipients can be entered using the comma-separated format indicated by the interface.
Can I run an immediate scan when Auto Scan is enabled?
Yes.
Click Run Scan from the Auto Scan screen if you want to run a scan immediately instead of waiting for the next scheduled run.
Where can I see the next automatic scan?
The Next scheduled run information on the Auto Scan screen shows when the next scheduled scan will run.
Notifications FAQs
What is the Notifications tab used for?
The Notifications tab lets you review link scan activity and broken-link email notification history.
It contains:
Scan Run History and Notification History.
View Scan & Notification History →
What is Scan Run History?
Scan Run History shows information about recent manual and scheduled scans.
It can include the run time, trigger, scope, coverage, scanned posts, total links, broken links, email status, and post type breakdown.
What is Notification History?
Notification History records broken-link email alerts that have been sent.
It can show when an alert was sent, its subject, recipients, broken-link count, and post type information.
Why is my Notification History empty?
Notification History may be empty when no applicable broken-link email alert has been sent.
Check that email alerts are enabled in Auto Scan, a recipient email is configured, and an applicable scan has detected broken links.
Can I clear scan or notification history?
Yes.
Use Reset Records in the corresponding history section when you intentionally want to clear its stored records.
Smart Redirects FAQs
What are Smart Redirects?
Smart Redirects can automatically create 301 redirects for eligible broken internal singular URLs detected during scanning.
For supported post types, the broken URL can be redirected to its corresponding post-type archive.
For example:
/blog/deleted-post/ → /blog/
How do I enable Smart Redirects?
Go to:
SEO Repair Kit → Links Manager → Smart Redirects
Enable Smart Redirect automation, select the required supported post types, and click Save Settings.
Why can’t I enable Smart Redirects for some post types?
Smart Redirects requires an applicable post-type archive destination.
If a post type displays No archive page, it cannot use this archive-based Smart Redirect behavior.
Are Smart Redirects the same as the Redirection Manager?
No.
Smart Redirects automates a specific redirect workflow for eligible broken internal URLs.
The Redirection Manager provides broader control for creating and managing redirects across your website.
Where can I see redirects created by Smart Redirects?
Generated Smart Redirect records can be reviewed under Smart Redirect Records.
You can also click Manage All Redirects to access SEO Repair Kit’s main Redirection Manager.
Can I filter Smart Redirect records?
Yes.
You can filter Smart Redirect records by available Post Type and Status options.
Internal Linking FAQs
What is Internal Linking?
Internal Linking helps you improve and manage links between content on your own website.
It has its own workflow for internal link management and therefore has separate documentation.
Is Internal Linking the same as Links Scan?
No.
Links Scan focuses on checking existing links and identifying broken links.
Internal Linking focuses on links between content on your own website and provides a separate set of tools for managing internal linking opportunities.
Links Manager vs Other Tools
What is the difference between Links Scan and 404 Monitor?
They identify link problems in different ways.
Links Scan actively checks links contained within selected WordPress content.
404 Monitor records requests made to missing URLs on your website.
A URL appearing in one tool does not necessarily mean it will appear in the other.
What is the difference between Links Scan and Auto Scan?
Links Scan lets you manually select content and run a scan when needed.
Auto Scan lets SEO Repair Kit perform recurring scans according to your saved schedule and configuration.
You can use both together.
What is the difference between 404 Monitor and Smart Redirects?
404 Monitor records requests to missing URLs so you can review them.
Smart Redirects automatically handles a specific type of eligible broken internal URL by creating a redirect to the corresponding post-type archive.